I wasn’t keen on the way the steering wheel on my 2016 Limited LTZ felt in my hands. The texture of the rim bothered me, so I started considering what I might do about that. I looked at several leather wrapping kits. The better ones were going for $60 to $80, and I was in for hours of pain and suffering, with no guarantee that I’d be happy with the results if I went that route.
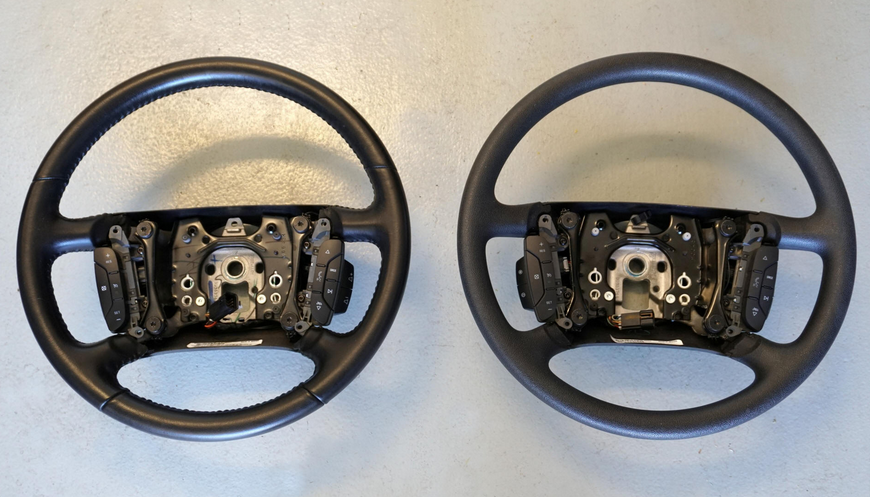
Time for some browsing on eBay. And ah-ha! As we all know, before the Gen 8 (actually Gen 9) was demoted to a “Limited” line marketed to only corporations, government agencies, and rental companies, this was THE Impala, and leather-wrapped wheels were available with at least some trim levels. An eBay vendor had listed a pristine example from a 2012 for a mere $75. It even had all the right controls, so I bought it. Below is a comparison photo of the replacement wheel next to the original after I had removed that one from the car. Not much difference to see in this photo …
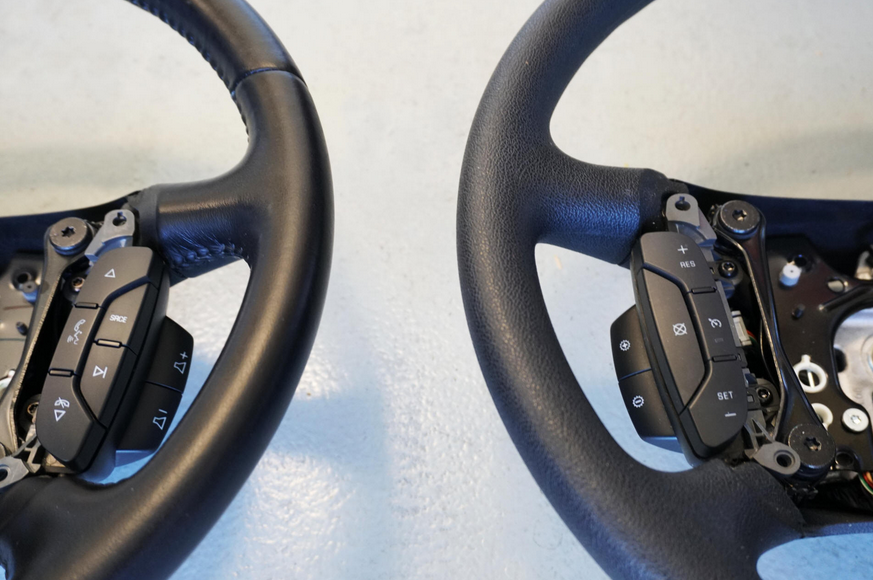
But upon closer examination, the improvements are readily apparent. This
close-up of the rims, side-by-side really tells the tale with respect
to both the visual and tactile differences
And here’s a shot of the 2012 leather wheel in my car after I had completed the swap …
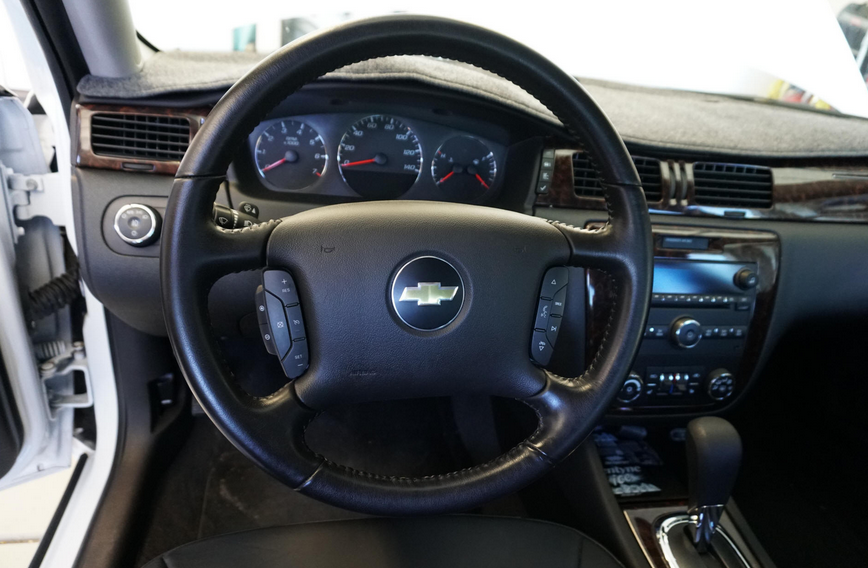
I think it really enhances the ambience of the interior, as well as the feel of the wheel.
Is this a difficult upgrade, you might ask? Not at all. Here’s the Reader’s Digest version of the process:
The first thing to do is to disconnect the negative battery terminal and wait a few minutes to allow any residual circuit power to dissipate, because you don’t want the airbag deploying in your face.
Next, release the air bag module from the wheel. This is quite easy to do, as it’s secured by only a couple of spring bars. There are two small holes, one on either side of the wheel shroud behind the rim. The module's clips can be released by inserting a 3mm Allen wrench into these holes and pressing against the retention bars. It may take a little fishing around in there to find the retention bar on each side, but that side of the horn button will pop away from the wheel a little as soon as you hit the sweet spot.
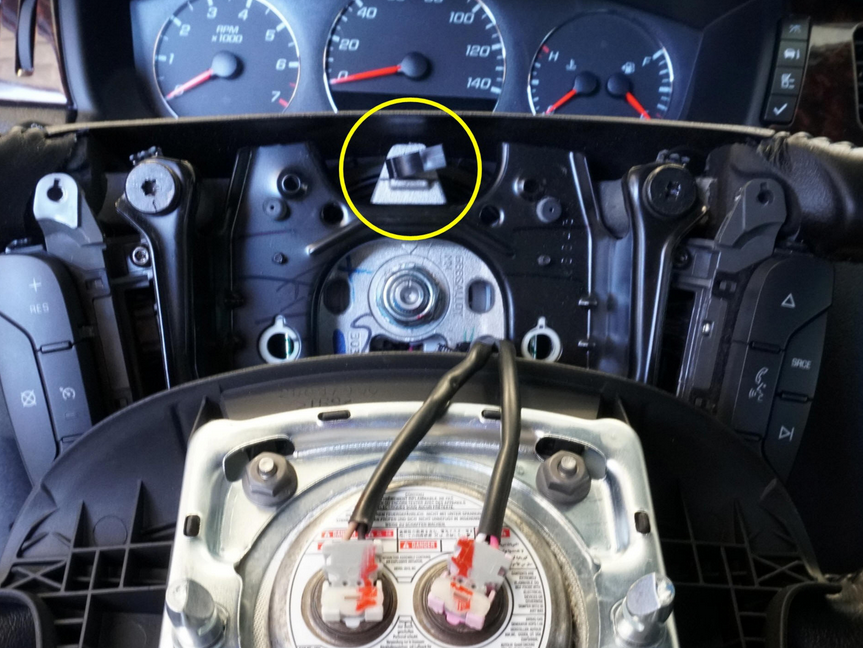
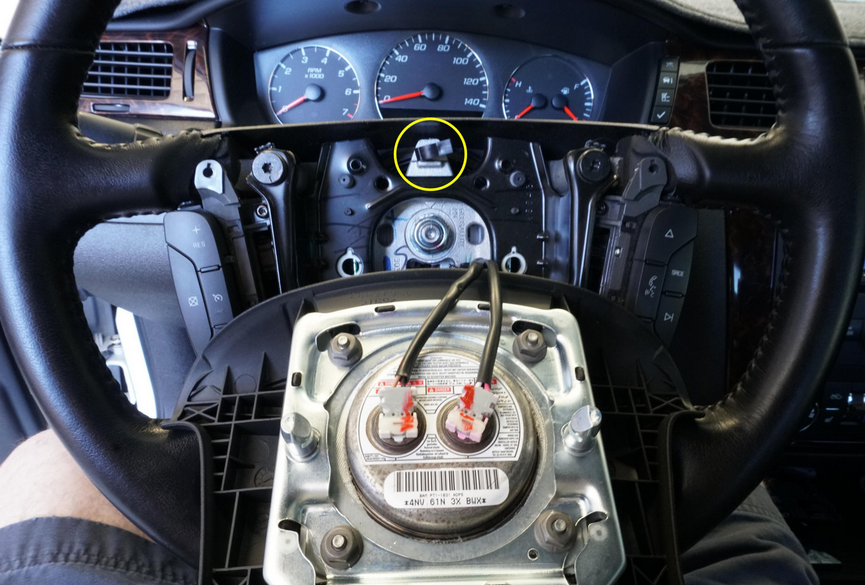
Now, lift the horn pad assembly away from the wheel far enough to open the cable retainer circled in the photo below. This is a snap-closure retainer that can be opened by inserting a small flat blade screwdriver into its right side and gently twisting until the two halves separate.
Do NOT try to pry this retainer out of the wheel’s metal frame, because it has locking tabs that splay out on the back side of the frame. After you have removed the wheel from your car, you can free this retainer by squeezing the tabs on the back side and pulling it away if you need to relocate it to your replacement wheel. (This retainer had been cut open on my replacement wheel, so I had to transfer the one from the original wheel.)
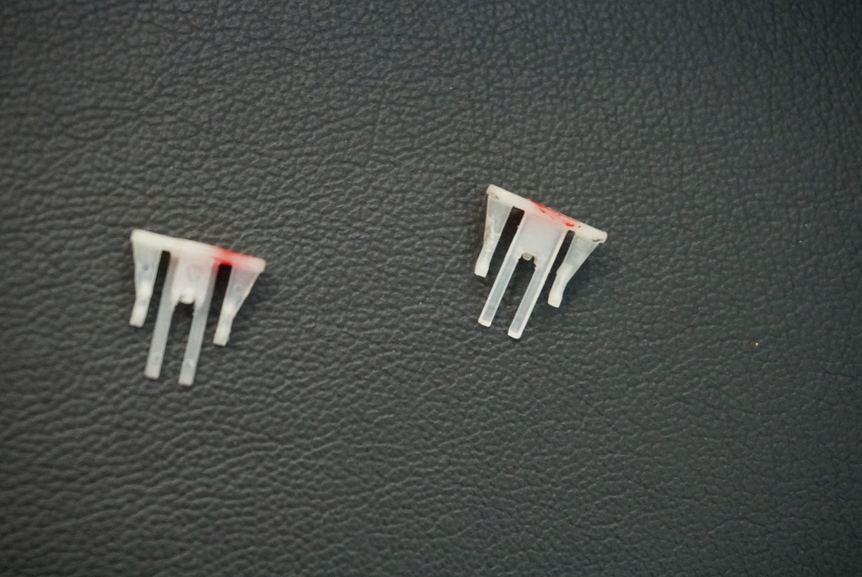
After you’ve freed the harnesses from that retainer, you’ll have a clear view of the connectors on the back of the air bag module, as shown above, and next up is disconnecting those two plugs from the module. Here’s where I hit a snag, because the YouTube video I viewed said to just squeeze the locking ears on the plugs to release them. It didn’t mention the fact that you can squeeze until you’re blue in the face without getting any joy UNTIL you have removed the nylon locking clips from the plugs. The locking clips must be carefully pried straight off the plugs to avoid breaking them. They look like this …
Okay, now the air bag module is free from the wheel and can be set aside. There’s one more connector that must be unplugged prior to removing the steering wheel. In the photo below, you can see the two air bag module plugs that you have already disconnected circled in yellow. Below and to the right of those, you’ll see the other connector that needs to be unplugged, also circled in yellow. To the right of the air bag plugs is a harness retainer that CAN be just pulled straight out to free it from the wheel, because it’s held in place with a Christmas tree type fastener inserted into a blind hole.

At the top of the photo above is the 13/16” retention nut for the wheel.
After you have everything noted above disconnected and you have removed
this nut, you can remove the wheel by just rocking it on the stud a
little this way and that until it pulls free. Alternatively, if you have
a steering wheel puller with hooks you can use that. I have two
pullers, but neither has hooks, so I just rocked my wheel loose.
Installation of your replacement wheel is the reverse of the removal
procedure. After you have reconnected your air bag module and reinserted
the locking clips into the plugs, don’t forget to capture the air bag
electrical harnesses in the retainer circled in the shot below, and snap
it shut.
The horn pad will snap back into place by just pushing it straight in.
Reconnect your battery, and you’re good to go!
Cheers!