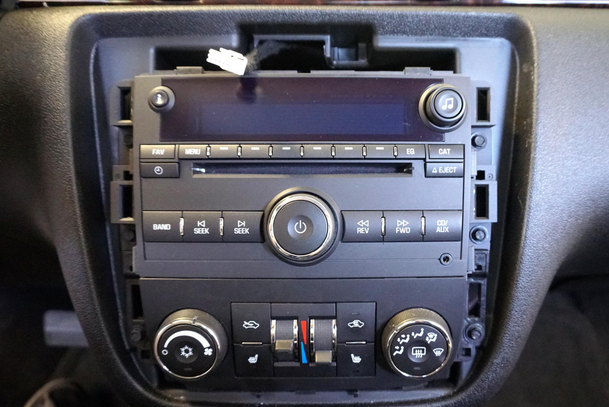
Although my factory Bose audio system sounded fine, it was a little short on expandability, so I contacted jtrosky about acquiring one of his customized Rosen radios to replace the OEM head unit. Jim told me that he currently had none of the GM1010’s, but he did have a 1210 that he could send me. Done deal.
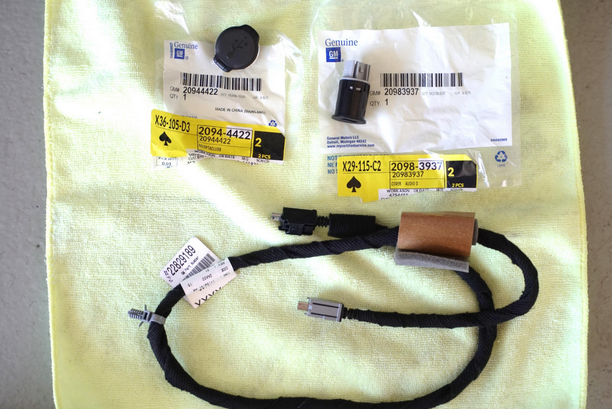
Besides the GPS navigation that the unit would include, I wanted an easy-access USB port and a backup camera, so while Jim was busy setting up and testing the Rosen, I set about looking into my options for those two additions. I discovered that GM parts that would enable me to replace one of the two 12V power ports under the center stack with a USB port were available, so I bought the three parts to make a complete kit. Buying only the snap-in trim ring/cover assembly and port module would have saved me a few dollars, but the Rosen was equipped with the GM-style locking USB connector, and so was the port, so I opted for the genuine GM cable with locking plugs. For those who are interested, the three parts necessary to complete the kit are shown below with their individual part numbers.
Backup cameras are ubiquitous and cheap, so I bought two, one with backup parking lines and one without. The camera with the parking lines was an Esky EC170-08, and the one without them was the Audiovox CMOS2 model. Although I hadn’t paid any attention at the time, the Esky was a CCD model, so I could compare the image quality between the two while I was determining whether or not I wanted the parking lines. More on that later.
Being a lefty, I generally take a “big picture” approach to my projects, so once I had all the bits and pieces in hand, I decided to work from the periphery into the head unit, leaving the final installation of that for last. First up, would be the replacement of one of the console 12V power ports with the USB port. This meant partially removing the console in order to get to the connector and clips on the power port. Fortunately, I had bought a soft copy set of shop manuals for the car, so I knew exactly how to go about it. The trim panel around the shifter is secured with speed clips, so it pops right out, revealing two screws with 7mm hex heads. Four more identical screws are located under the little felt pad inside the storage compartment beneath the arm rest. Once these six retainers have been removed the rear of the console can be tilted up and slid back to reveal the connectors and power ports, as shown below:
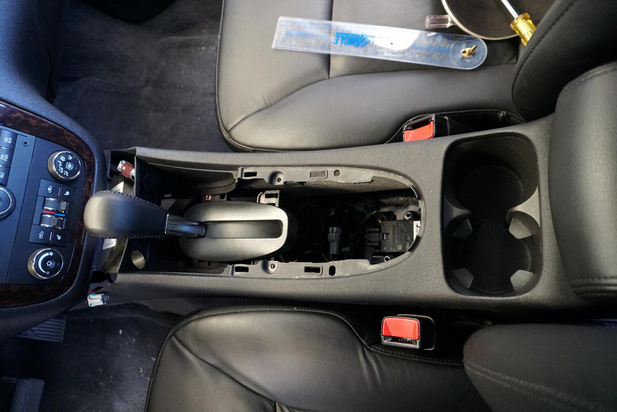
In the above photo, you can see that I’ve already removed the power port that I decided to replace. All that remained to do was to snap the USB trim ring and cover into the open hole, and then snap the USB port into the trim ring.
IMPORTANT: DO NOT SNAP THE PORT INTO THE RING PRIOR TO INSTALLING THE RING IN THE HOLE!
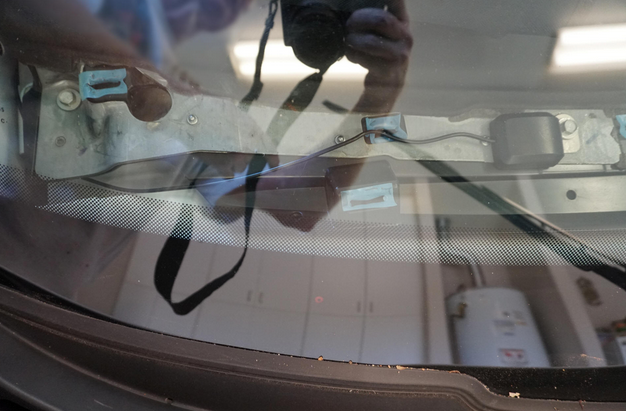
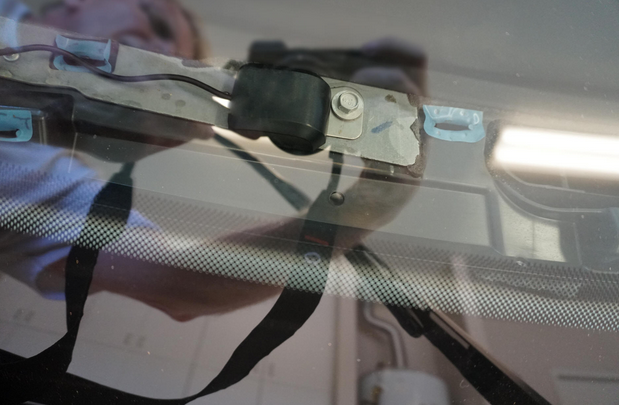
Installing the GPS antenna was next up. I removed the two A-pillar trim covers (secured with one screw and two speed clips each), and popped out the defroster panel (secured with speed clips). This gave me a clear view through the windshield of exactly what was there, making it easy to select a good spot for the antenna. As you can see in the photos below (please excuse the reflections off the windshield), there is a nice galvanized steel plate on the passenger side that the magnetic antenna base will grip to very tightly, making it unnecessary to use the little sticky-back metal pad that comes with the antenna. I found an area on the plate where I could wedge the antenna in between a bolt and pop-rivet, to prevent it from sliding laterally, as shown in the close-up below.
I followed Jim’s suggestion and popped off the dash end cap (3 speed
clips) to route the cable down into the dash. Then, I opened the glove
box and fully lowered it, again following Jim’s instructions, to run the
cable to the center stack in the area behind the box. After moving the
antenna away from all the speed clip holes, I snapped the defroster
panel and dash side cover back in place.
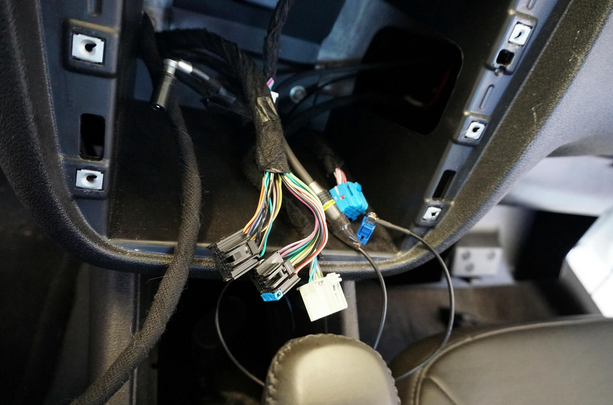
Next, I needed to run a video RCA cable for the backup camera. I also
wanted to run the USB and GPS antenna cables into the area where the OEM
head unit was located, so it was now time to remove the old unit. The
trim bezel is retained with only speed clips and pops right off,
revealing six screws that need to be removed.
The two fasteners (7mm hex head) securing the HVAC controls need to be
removed first. After disconnecting the two HVAC electrical harnesses and
setting it aside, I removed the four screws securing the radio and slid
it out far enough to disconnect its two harnesses and the radio
antenna. After the head unit was disconnected, I set it aside. I then
ran the USB cable up to an opening on the driver side of the open center
stack, and ran the GPS antenna into the center stack from an opening on
the passenger side. I then taped a video cable to the GPS antenna
cable, so I could use it as a fish line to pull the video cable into the
center stack, as well. The photo below shows the end result:
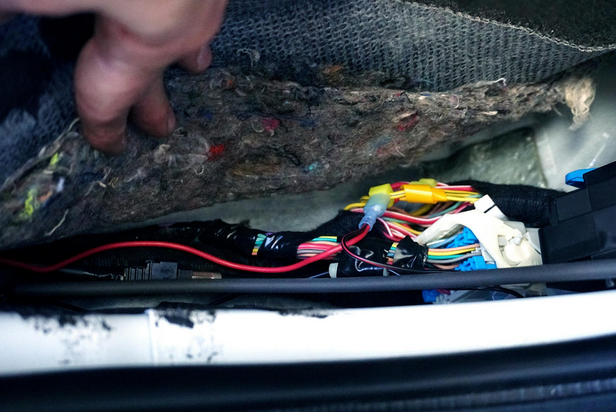
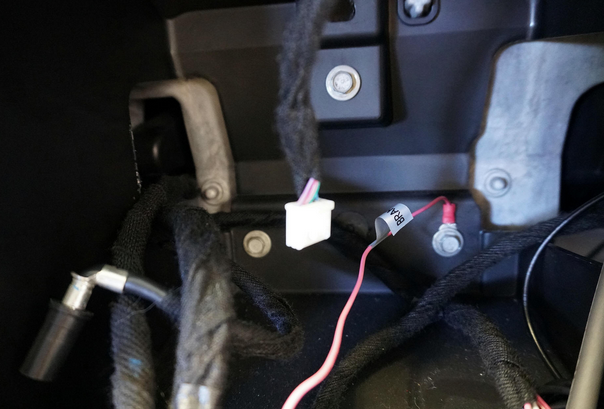
Next, I needed power for the camera. I wanted the camera continuously
powered, rather than live only when the car was backing, and I already
had the ideal connection in mind. I had previously located a retained
power wire source for my radar detector, so I added a camera power lead
to the same spot. The yellow wire with the stripe shown in the photo
below exhibits the same behavior as the radio power circuit. It doesn’t
go hot until the car is started, but it remains hot after the car is
switched off – until the door is opened. Perfect.
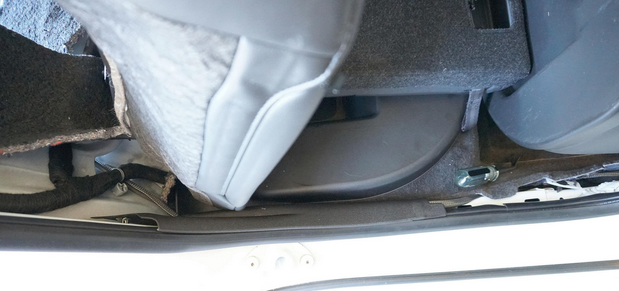
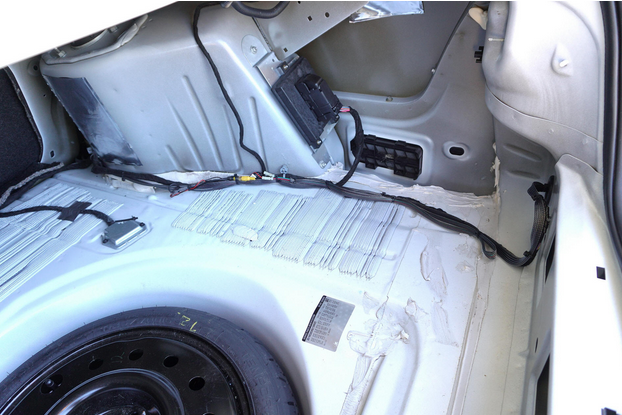
There’s a bolt near that 12V power tap that provides a solid chassis
ground, so I connected a camera ground lead there. Then, I sleeved both
wires in a fiberglass jacket for extra durability and ran them and the
video cable along the rocker panel and into the trunk through a small
opening that I had located behind the rear seatback. The opening I used
is visible in the photo below.
In preparation for the camera installation, I had already removed most
of the trunk panels, and with the signal and power cables now in the
trunk, it was time to decide which camera I wanted to use. I connected
up the Rosen and rested it in the center stack opening while I ran my
little comparison. Daytime performance between the two cameras was
virtually identical. Both had good color and decent dynamic range, as
demonstrated by their ability to still provide good shadow detail while
viewing a scene that was primarily in bright sunshine. Both cameras also
displayed the same amount of image grain. The only real difference I
could see was that backing lines were superimposed over one image. I
decided I didn’t want the backing grid, so I opted for the camera
without them, which happened to be the Audiovox CMOS2.
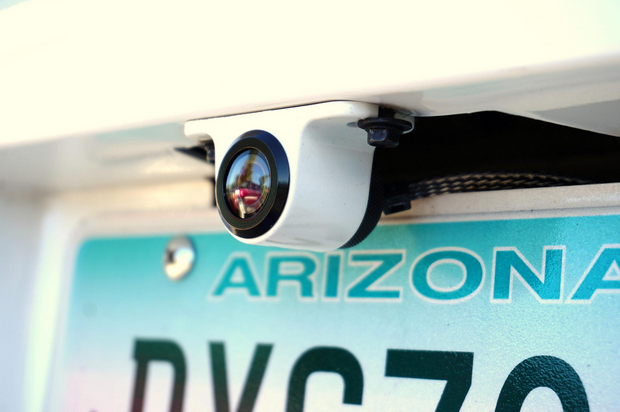
The CMOS2 camera comes with an assortment of different mounting
hardware, including a surface-mount housing, which I had already painted
the same color as the car’s body after slotting the mounting holes so I
could use the same screws that secure the license plate lamp. Below are
a couple photos of the mounted camera. I have not yet used the
Dupli-Color touch-up paint on the screws, but rest assured that WILL be
done.
I sheathed the camera cable with a fiberglass jacket and ran it up into the trunk through the body grommet below the passenger tail lamp that Jim had suggested. But I also slit a second opening in this grommet and ran the cable through that, rather than pinching it between the grommet and the panel Then, I sealed the grommet with black silicone sealant. The photo below shows how it all looked after connecting everything up and tie-wrapping the harness to the OEM harness already there.
Now, about the “BRAKE” cable on the Rosen ... if you connect it as the manufacturer instructs, certain functions, such as DVD playback, will be prohibited unless you have the parking brake set, but if you simply ground that wire, those restrictions disappear. My trusty DVM indicated that the three bolts behind the radio/HVAC controls in the back of the center stack opening offered solid chassis ground, so I used one of those, as shown in the photo below.
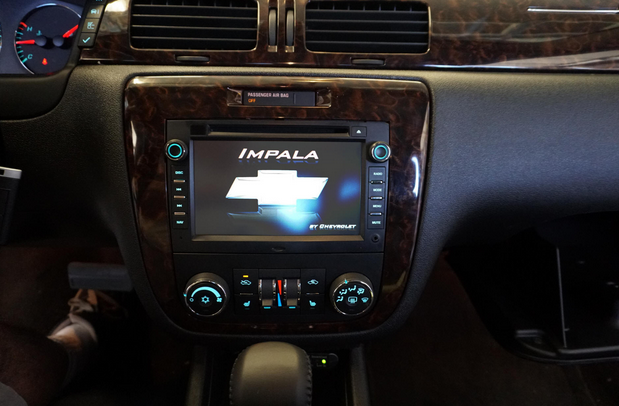
After hooking up all of the connections on the Rosen, I slid it all the way into position and screwed it to the center stack. Then, I reinstalled the HVAC controls and the trim bezel. The finished installation looked like this:
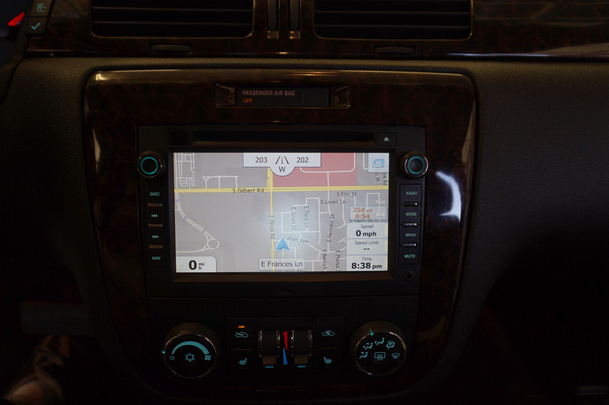
Nav functionality looks like this:
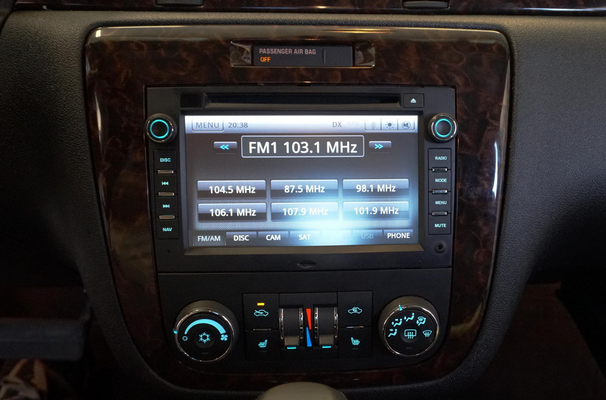
The radio screen looks like this:
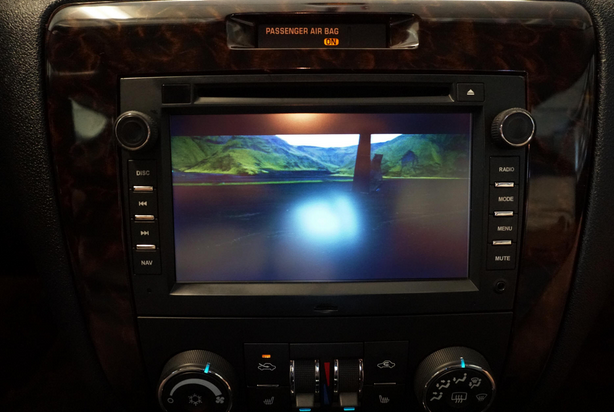
And finally, a DVD image looks like this:
My initial impression of Jim’s customized Rosen GM1210 is 100% positive. The unit sounds at least as good as the OEM head unit, if not a little better. It offers many source options that the factory unit didn’t, and it looks like it was installed when the car was built. I love it! My thanks to Jim for making this possible, and for being there with the answers to my questions during the installation.