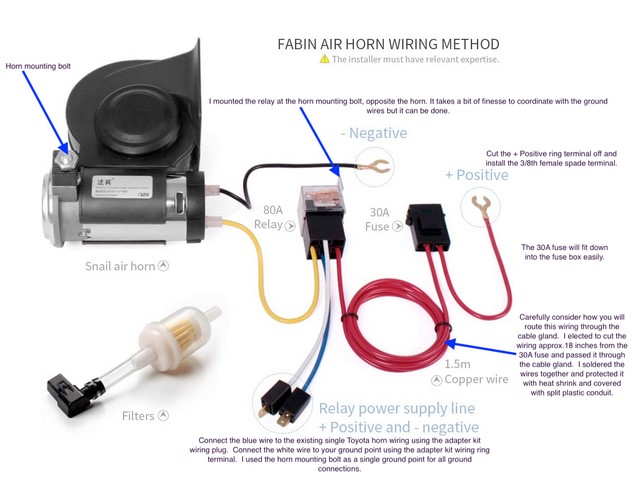
Sometimes we have to react to the “defensive” drivers using on-board systems. This mod installed a Farbin air horn on my Highlander Hybrid that is considerably louder than the low-tone, high-tone combination of horns as delivered. I used a combo package that includes what you see below plus adapter wiring for Toyota specific vehicle horn wiring
Access to the horn mounting area is easy enough; remove the nine panel retainers and lift the cover panel out of the way. Note the leading edge (vehicle front) of the panel is inserted slightly in the front rubber gasket. Ensure you correctly line the panel front inside the rubber gasket when reinstalling it.
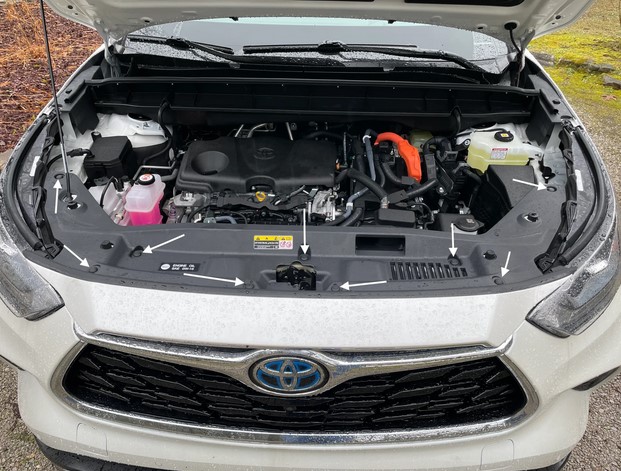
Look down into the open area just aft of the hood latch; you will see the two horns and their mounting positions. I removed the left horn (facing the engine view). I used the factory horn mounting location for all grounds as it kept wiring short and clean.
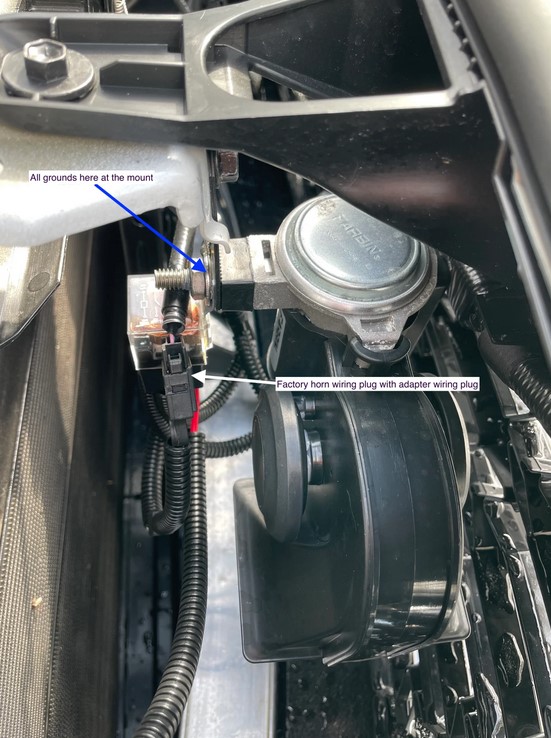
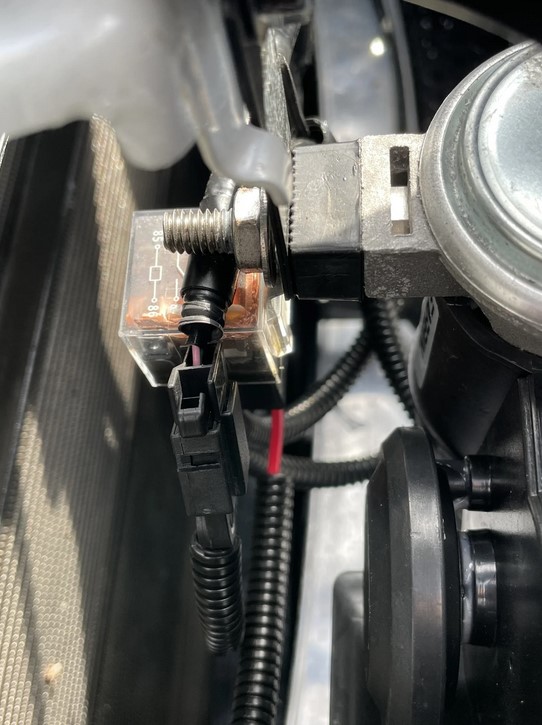
Familiarize yourself with the mounting location and the horn mount itself and install the horn using the factory mount location. I chose to install the relay in this same location so I would not have to drill another ground hole in the frame. This required oversizing the relay mounting bracket hole and the factory mounting bracket (removes easily) as well as a longer mounting bolt.
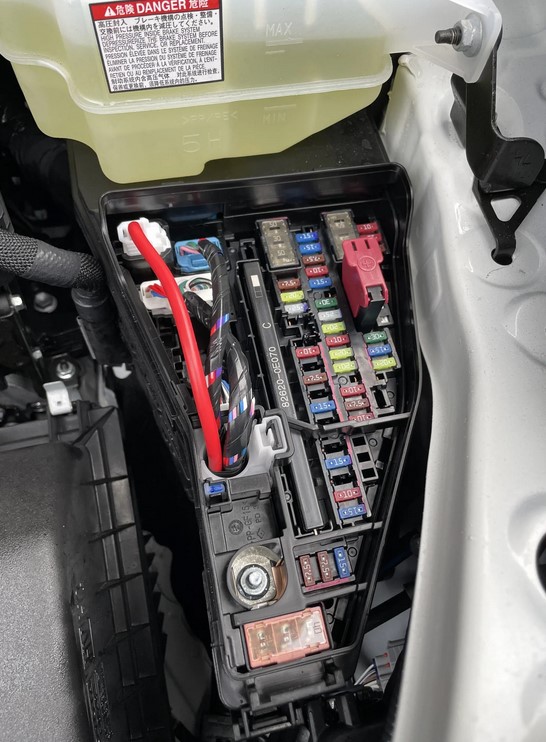
I spent a considerable amount of time looking for a reliable power source with easy access. With the hood open, the right-hand fuse box seemed to be the natural place to go. Once opened I was convinced this fuse box was anything but easy to gain access inside.
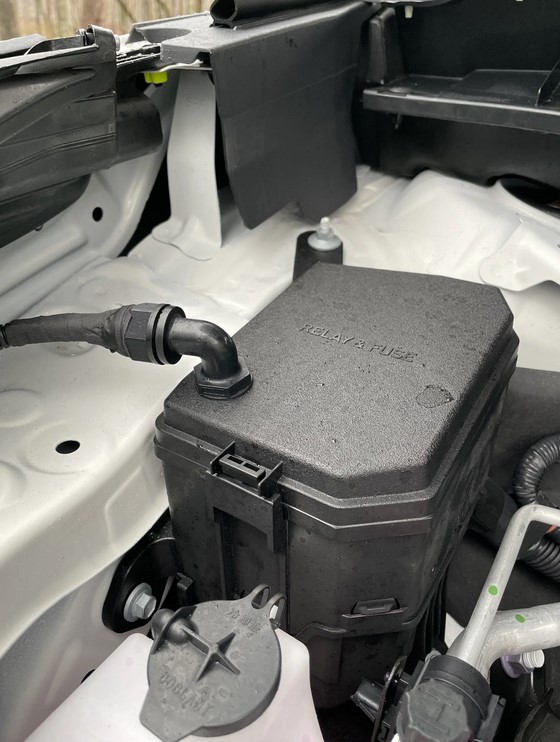
After looking at the left rear (facing the engine view) fuse box I found it much more useful for power and the only real challenge was access to the inside while retaining a semblance of weather resistance that Toyota builds in. I solved that by using a weather resistant cable gland.
NOTE: Other power sources may be available; I chose this one after considering the options.
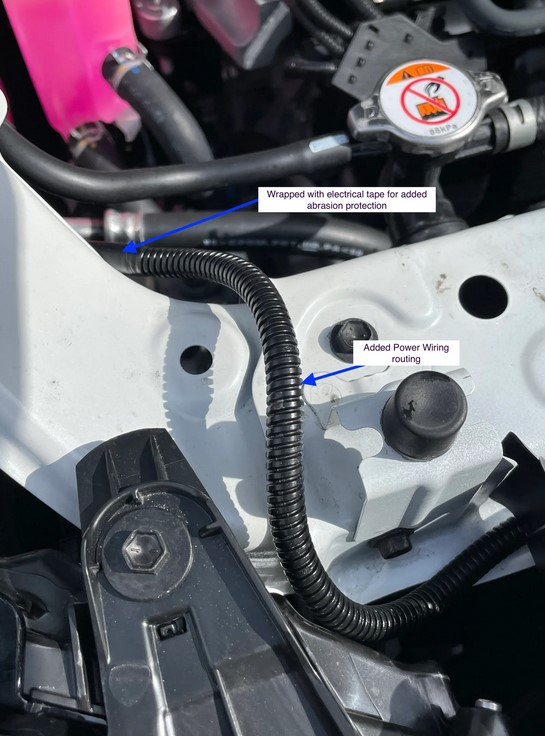
I ran the power wire over to the left rear fuse box, covering it with small diameter split plastic conduit for element and abrasion protection. The wiring will easily fit under the previously removed engine cover. Route the new wiring along with existing wiring runs and tie in.

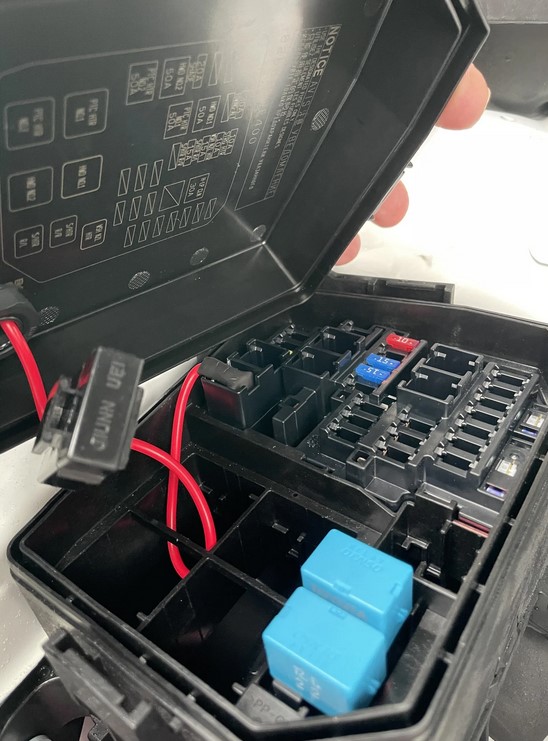
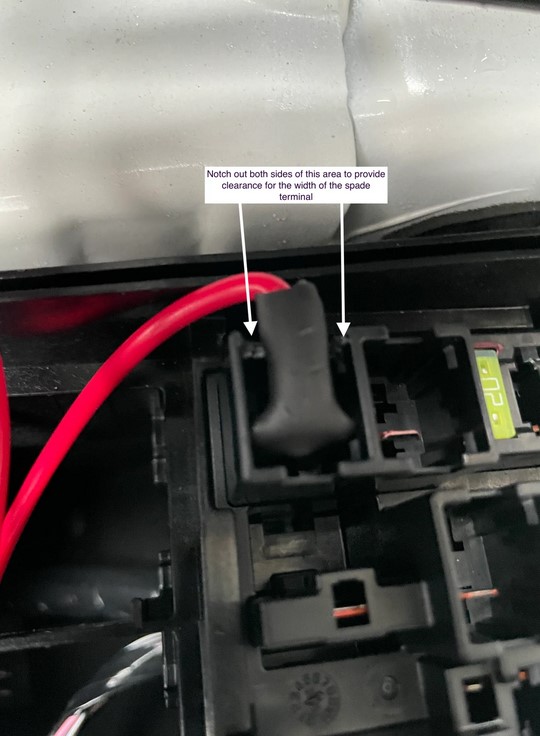
I tapped into the existing unused blade for PTC HTR #2 using an oversize 3/8th female terminal available here. I bent the blade 90 degrees for clearance with the fuse box top cover and insulated it with heat shrink. You will have to notch out the outboard area for the terminal end to clear. This blade is rated 50A and HOT all of the time. If you choose to do this mod, using this terminal, be forewarned! Use of protective rubber gloves and insulated tools is highly recommended. There are other exposed blade terminals in this fuse box that are HOT as well. You can be seriously injured, possibly killed, if you are careless working in this fuse box area!
Tidy all wiring runs, double check mounting bolts, and reinstall the cover and ops check. Note - I suggest you advise anyone standing nearby of your intentions when ops checking. 😁
I decided to leave the other factory installed horn connected; no harm having a little more sound because I am trying to get someone’s attention. And this combination gets attention. You can scroll down to the video section of the provided link to get an idea of the sound the Farbin horn makes.
I actually performed this mod over a month ago. I wanted to get real world experience before I posted this. I don’t use my horn in retaliation as some people might, therefore I had to wait for a driving situation which warranted its use.
In driving conditions it does not seem as though the horn is much louder that the stock horns. Through experience I can say that this horn is heard very well and serves the purpose I hoped for.