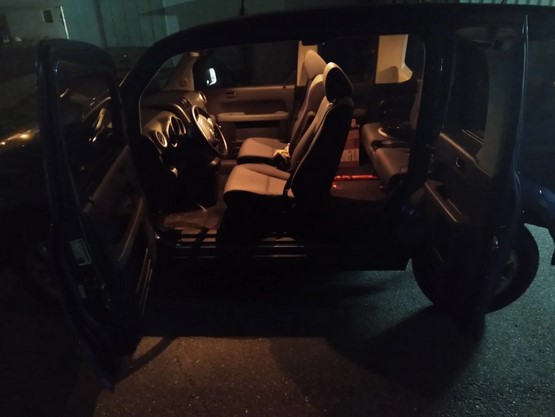
I noticed that when I open my doors, it's very dim! The element doesn't have courtesy lights??? This is a problem for me, as I bought my E to transport my powered paragliding obsession. I always end up packing it up after sunset, so exterior lighting is very important to me. This modification adds courtesy lights to the doors of the Element, only turning on when the doors are open as one would expect, NOT with dome light triggers. This means it is compatible with the double dome light mod and dome+map lights mod. Because the element has interior plastics that sit quite flush with the door frame, and the door plastics are fairly shallow, I elected to install lights under the door handles.
(Actual light brightness is only slightly brighter than OEM dome lights, night camera shots are hard to capture.)
Difficulty: 3, lots of interior and door panels need removing, wires need to be fished through the door boots which is a bit extra on the rear doors. Electrically, fairly simple. (1 being easy, 5 being difficult)
Tools: Stripper/crimpers, #2 phillips head screwdriver, pry tool, multimeter
Materials: wire (~25 ft on driver side, ~35 ft on passenger side), crimp connectors, diodes, LED lights
Cost: $50-$60.
We'll start on the back doors, they are the more difficult of the two. The back door has a front door trigger (a small button that is depressed when the front door is closed) and two rear door triggers (the upper and lower latches). We must diode isolate one of the latches from the front door trigger button, as they are on the same circuit. If you don't use a diode here, the rear courtesy lights will turn on when you open only the front door.
Step 1: Take the rear door panel off. I will not go over this, watch a youtube video on it.
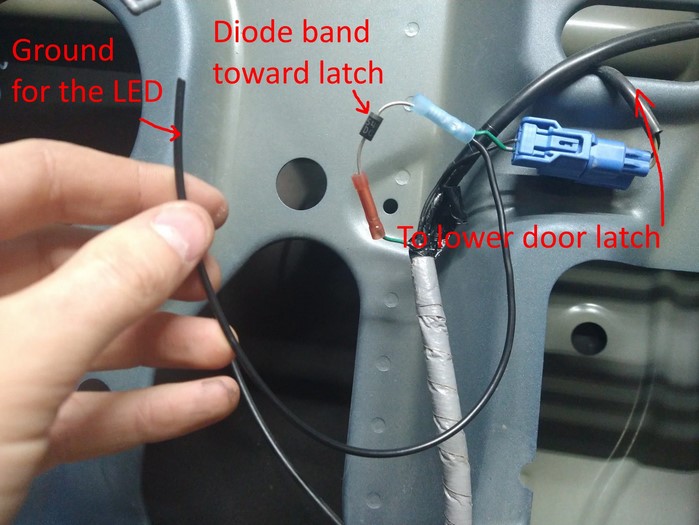
Step 2: Find and cut the lower latch wire (green wire, blue plug on the left side. Grey/black wire, blue plug on the right side.), install a diode as pictured and run a wire from the latch side of the diode to supply a ground to your LED when the rear door is open. Be sure to heat shrink the diode to keep it from shorting out accidentally (heat shrink omitted for clarity).
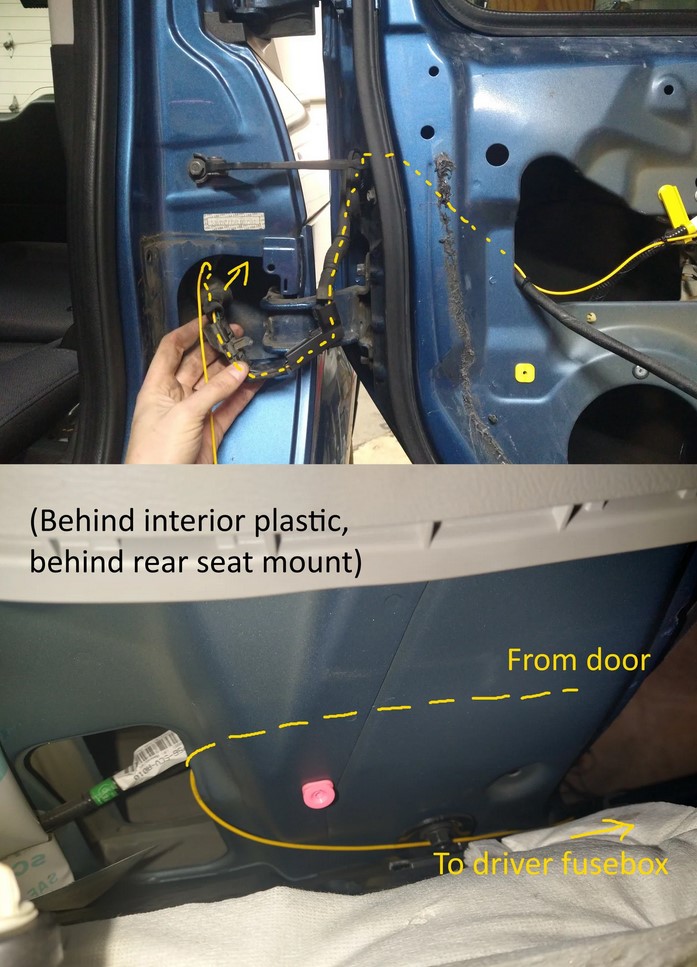
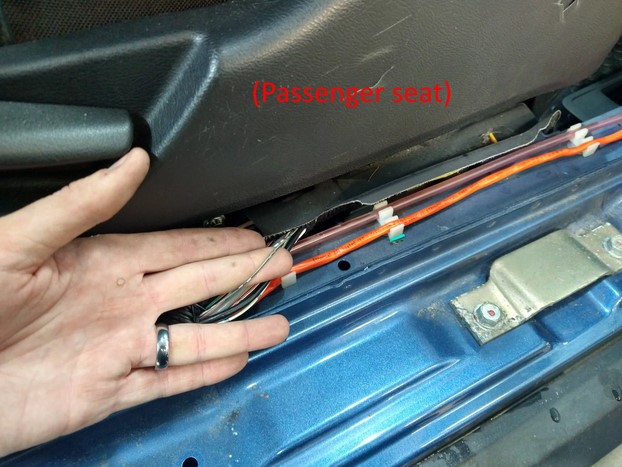
Step 2: Run the power wire for the rear LED. This is a bit tricky, you must run it through a rubber boot, through the plastic channel on the door hinge, and through another rubber boot. Then into the car and past a vapor shield/plastic sheet, which is only accessible after you remove the rear seat and the one screw behind the rear seat mount cover. After that, run the wire towards the front of the vehicle. This will be a fairly long wire, 14 ft on the driver side and probably 18 ft or so on the passenger side. The goal is to get from the blue plug in step 1 to the fuse box under the steering wheel. Shown in yellow for clarity.
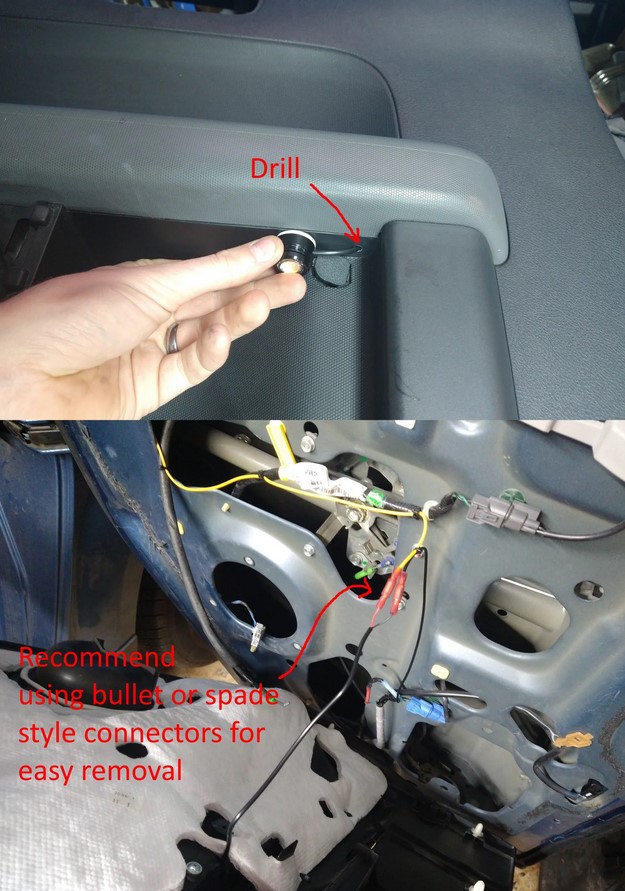
Step 3: Drill a hole for your LED's wiring. You may want to wait to mount until both are in place and working. Placement will depend on your LED and preferences. I chose focused, spot-light/projector style 1" round fixture, so I chose a placement near the front of the rear door, and the rear of the front door to balance how far the lights cast and where the edges of the beam are cut by the door panel. Drill a hole for wires as needed and connect them to your wiring. Re-attach you rear door paneling. Again, watch a youtube video if you need instructions on that.
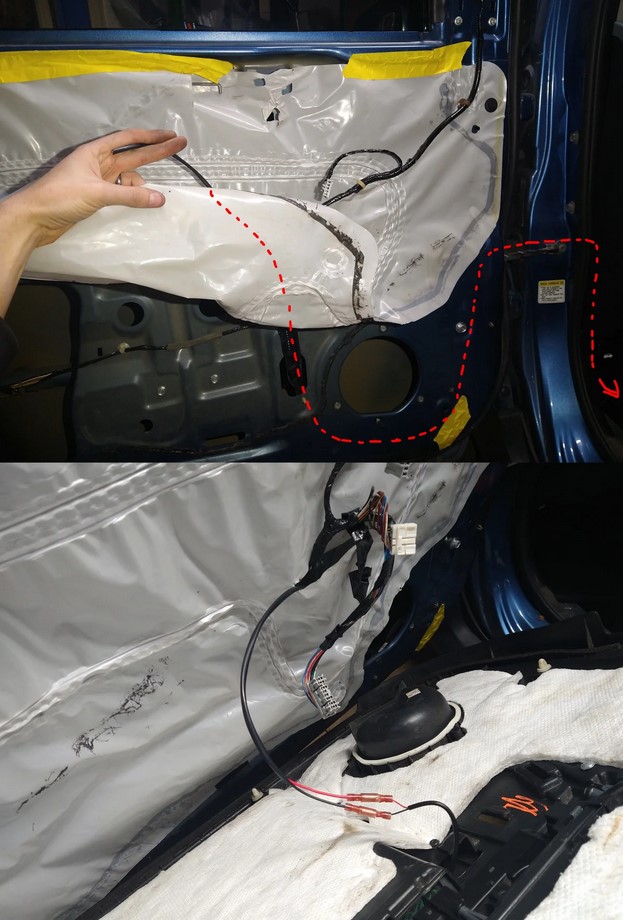
Step 4: Front door time! The front door trigger is actually housed in the rear door, so we need to run TWO (2) wires from the inside of the door panel to the inside of the car, through the rubber door boot. This is only a little easier than the rear because there's no seat to remove. I used red and black speaker wire for the job. Drill a hole for the light and connect the light to your wires like you did for the rear. The front window track is pretty aggressive/deep, be sure to follow the factory wiring through the door and into the boot, use zip ties along the way to avoid having your wire getting caught on the window as it moves up and down.
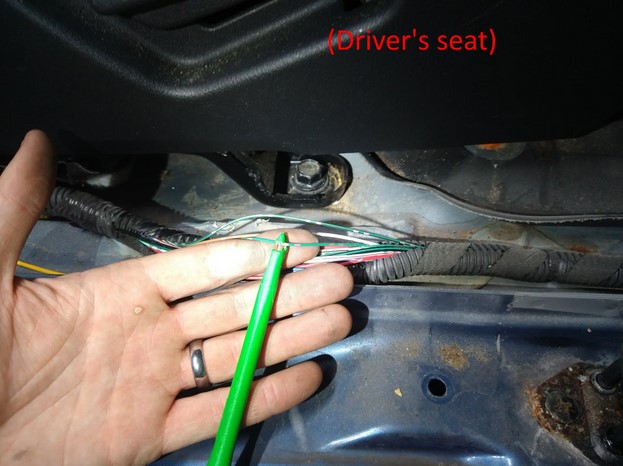
Step 5: Intercept and tap the front door trigger, remember this was in the rear door. For the driver side, that wire color is green. Passenger side is grey with a black stripe. I found both of the wires in the wire in the looms that runs along the respective door floorboard next to the seats. Test the wires to verify you have found the right one. With the front door open, and rear door closed, it should be a ground. When you press the front door button that is mounted in the rear door to simulate the front door being closed, the wire should fade to nothing, no ground or power on it. Attach the ground of the front door wire to this trigger.
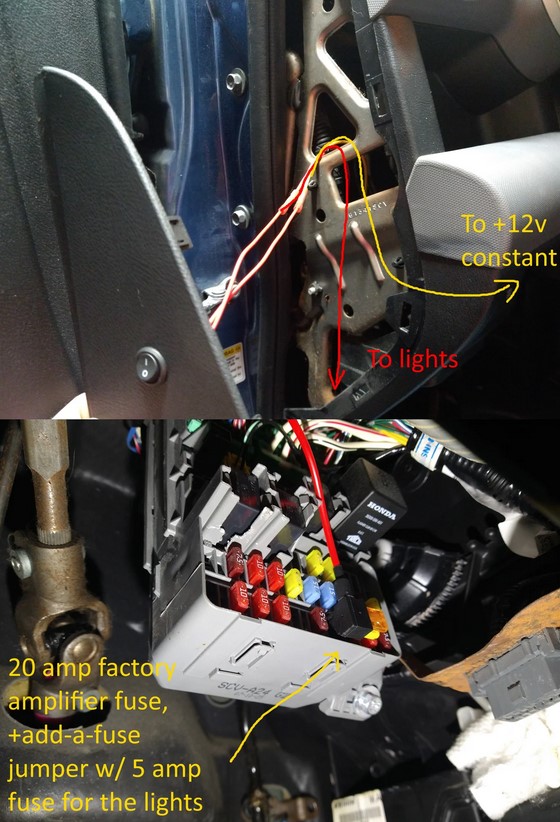
Step 6: Combine the front and rear power wires together (yellow from the back LED, red from the front in my wire color scheme), then attach them to a constant 12v source. This should show 12v when the car is on or off. I chose to draw my power from the 20 amp fuse that powers the factory amplifier in my 08 EX. I also elected to add a switch in the door jamb to let me disable these lights if I planned on leaving the doors open for long periods. That switch is optional, but useful for me. Be sure to fuse your new lights to protect the car. 5 amps should be more than enough for all 4 lights in every door.
Now all 4 lights are fed a constant 12volts, but only complete a circuit and turn on when their respective grounds are triggered as the door(s) open.
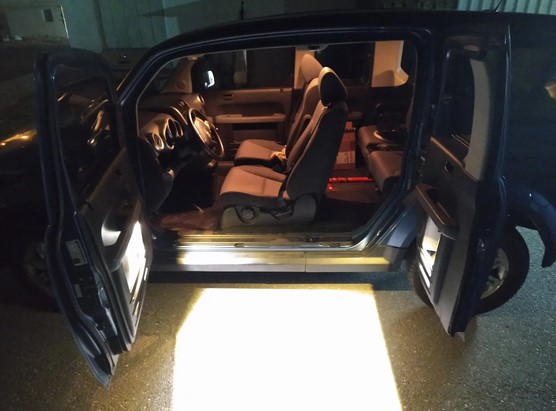
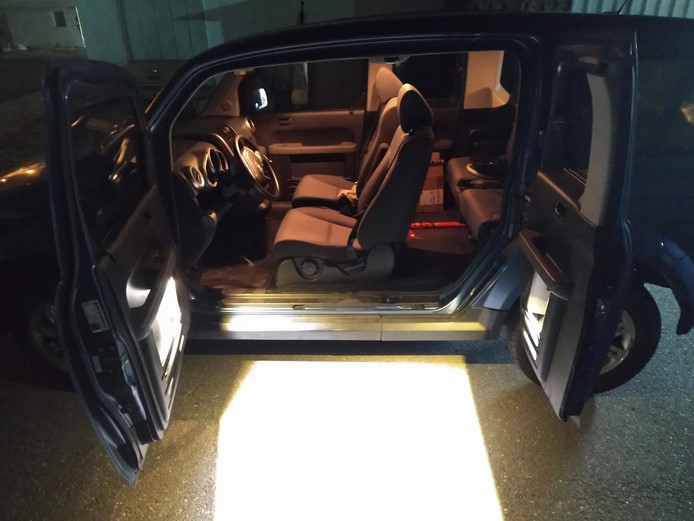
All done! The lights are not quite as extreme as the picture suggests, the camera was in night vision mode. You might opt to use light strips, multiple housings, or small bars to increase this lighting output. Your call! My little 1" round projectors are 155 lumens and plenty for my needs.