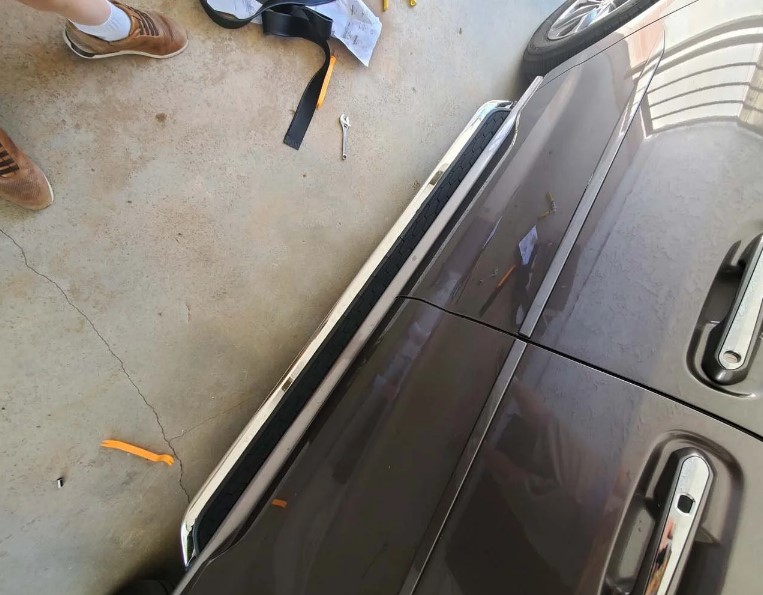
Since there seems to be very few running board options, and almost zero instructions, I decided it would be good to post my install of these generic, no-name running boards from ebay that seem to be working for some of us, known eloquently as "2Pcs Door Running Board Side Step Nerf Bar Fits for toyota Sienna 2021 2022 XL40"
These do the job. They hang down about 2" below the lowest part of plastic trim, so be aware of that if you are concerned about clearance. Also they interfere with the kick sensor, so if you rely on that, you might need another solution.
You will need/want:
A normal wrench
A socket wrench
10 mm, 12 mm, and 14 mm sockets
Shears or other basic cutting tool to cut through plastic
A screwdriver
(Optional) A jack/lift. (My car is already lifted so I did not need one).
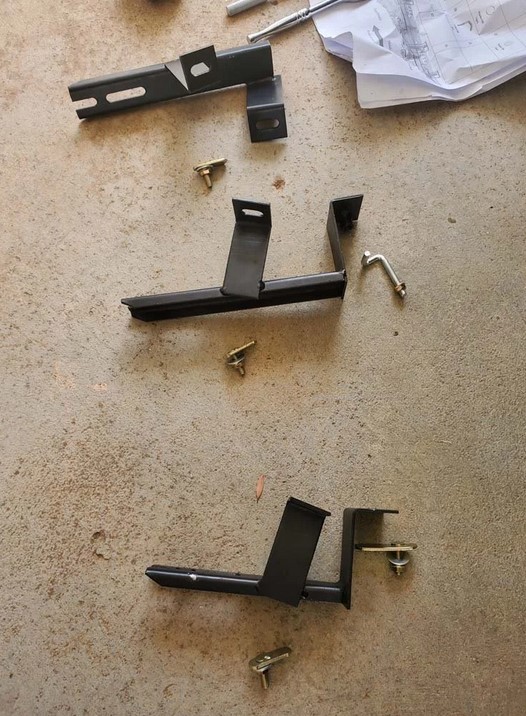
I'm going to start with the driver's side. First go ahead and grab the brackets and collect the hardware needed for each. From top to bottom here I've got the front bracket, middle bracket, and rear bracket, along with the fasteners they go with.
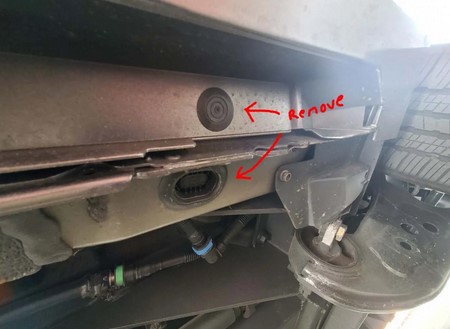
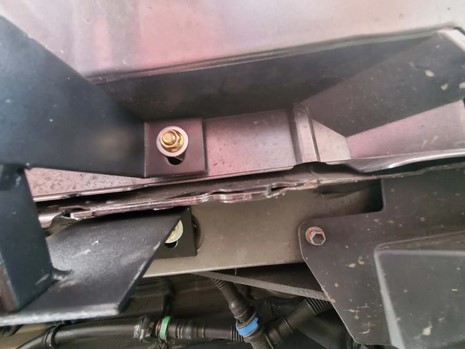
Starting with the rear, locate and remove these two plastic plugs.
Find the grab one small T bolt (5) and one large T bolt (6) and fish them into the small and large hole respectively like this.
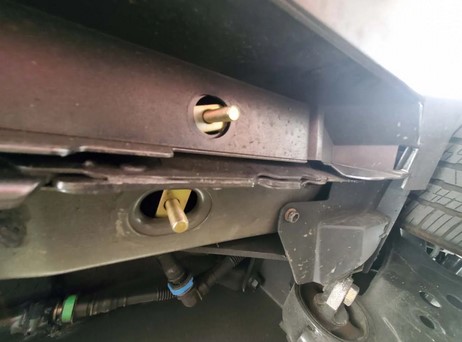
Fit the rear bracket over the bolts. Be careful not to push them into the car; it sucks trying to get them out! Put the small nut (10) and washer (12) on the small bolt and the large nut (8) and washer (7) on the large bolt and hand tighten them. The 'T' portion of the bolt catches on the inside of the frame and holds them in place.
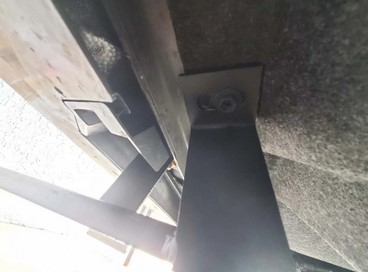
Now scoot towards the middle area of the car, look for these plugs, and remove them.
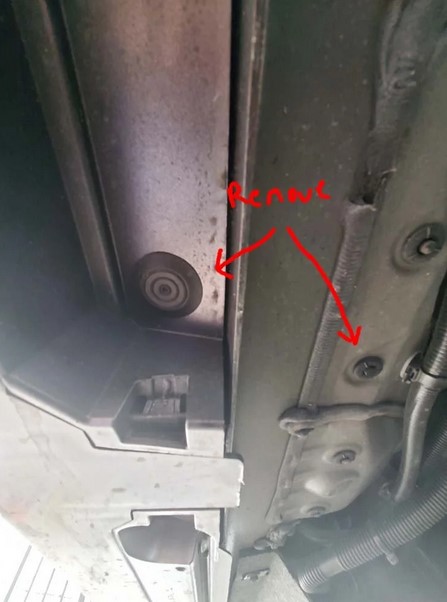
Fish a small T-bolt into the outer hole. For the inner one you need to use the J-bolt. Set them up so they hang down like this:
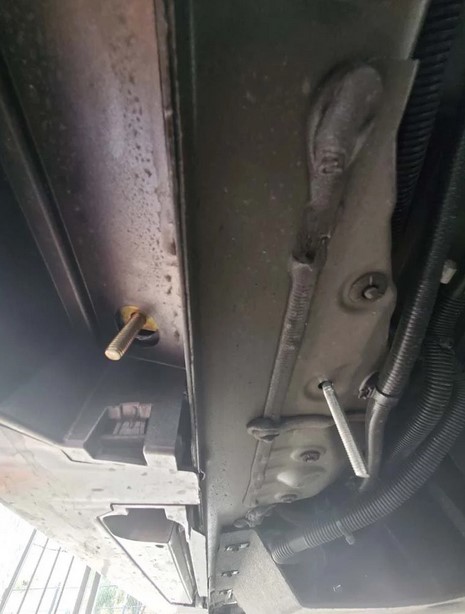
Again put the middle bracket over top of them, being careful not to push them inside (on my car I discovered that the hole the T-bolt is in was covered in lubricant and my hands got so slippery trying to fish it out that it made this step unnecessarily difficult). Use the smaller size bolt (10) and washer (12) on each of them.
Now scoot to the front part of the car and look for these parts. You need to remove the plastic fastener on the outside and unscrew the screw on the inside (I think it uses the 10mm socket). The fastener has two parts (like a drywall screw) and it's easiest if you pry up the inner part of the fastener before the outer. Keep both the fastener and screw around for later.
Now scoot to the front part of the car and look for these parts. You need to remove the plastic fastener on the outside and unscrew the screw on the inside (I think it uses the 10mm socket). The fastener has two parts (like a drywall screw) and it's easiest if you pry up the inner part of the fastener before the outer. Keep both the fastener and screw around for later.

With the plastic still pulled away, remove the (now exposed) plug covering the hole you need.
Fold the plastic back to where it was and clip it into place on the sides, then replace the 2-part fastener you removed earlier to hold it down. You should now have room to fish a small T-bolt through.
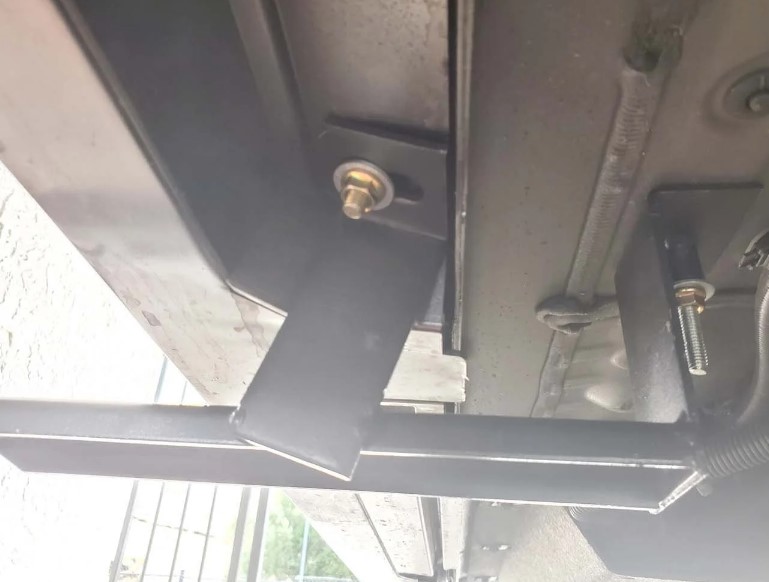
Place the front bracket carefully over the bolt and the hole from the screw you removed earlier. Hand tighten the small nut (10) and washer (12) on the bolt and fully tighten the screw you removed earlier (I normally prefer to leave everything hand-tight until the end but this screw seemed a bit iffy that way).
Now take one of the running boards (left and right are identical) and rest it on the brackets. There is some black weatherstripping on the board that you might be able to bend down and squeeze under, but I just took it off; there is a screw at each end holding it on. (Sorry, no pics of this step).
Looking on the underside, you should see there are about 10 bolts already attached to the boards, with a channel for the nuts on the other side. You want to loosen 6 of these and slide them down the board until you have 2 near each bracket.

This part is pretty simple - just unscrew the bolts, slide the nuts into place above the brackets, then screw them back in again.
Make sure the board is just where you want it (i.e. evenly spaced front to back, matching with the groove in the side of the car), then go ahead and tighten all the bolts and screws with a socket wrench.