I just finished adding a front interior light to my Venue SE. The actual installation wasn't too difficult, but figuring out the correct part and actually obtaining it was somewhat tricky.
Here's my story from start to finish, and hopefully it saves other people some time.
How many different configurations are there?
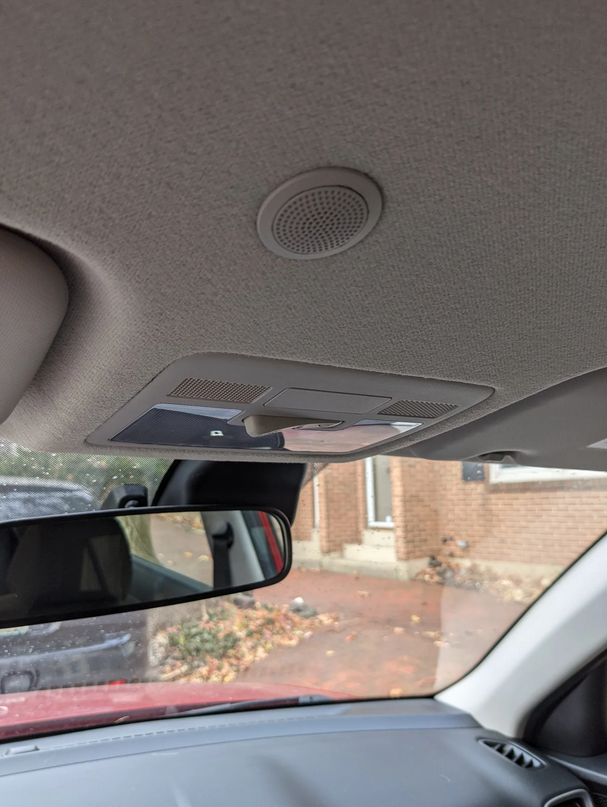
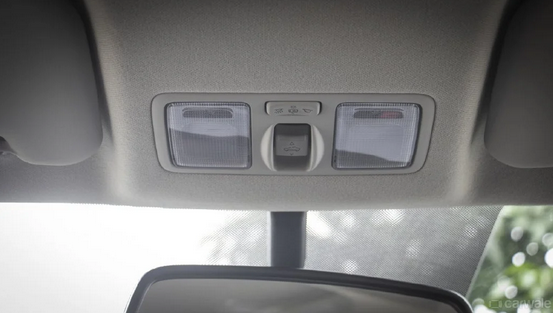
It's no secret that the Venue is an inexpensive car, so Hyundai obviously looked for ways to cut costs. So it's unsurprising that my Venue SE did not have an interior light in the front between the sun visors. I had only the center-mounted light, and a recessed blank spot up front like this:
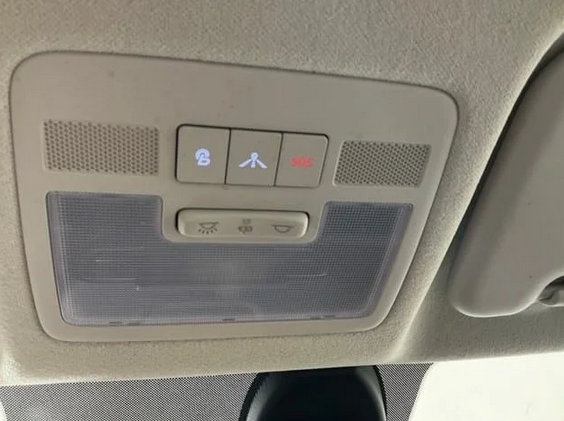
But by reading through forums and reviews I eventually learned that the Venue has (at least) 4 different map lamp configurations, depending on the options.
With sunroof, With Bluelink:
With sunroof, Without Bluelink:
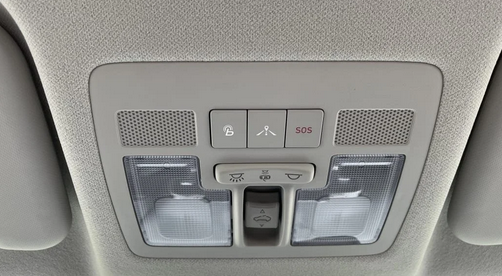
Without sunroof, With Bluelink:
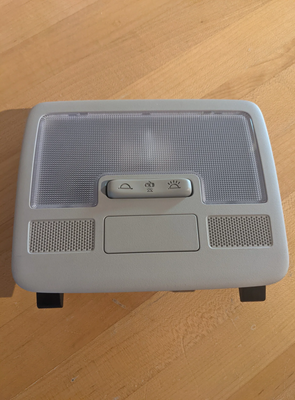
Without sunroof, Without Bluelink:

Which part number?
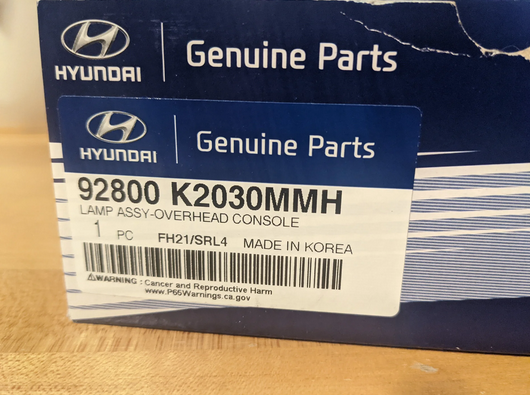
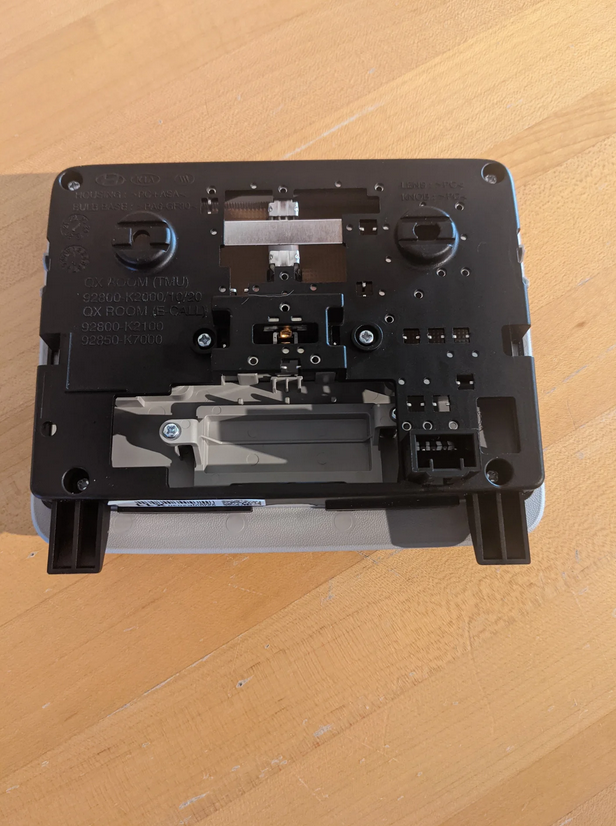
The lamp in picture number 4 is the one that needed for my SE, but finding the correct part number is sometimes tricky with Hyundai. Their parts diagrams and descriptions are often identical, even for parts that seem like they should be different.
Eventually I happened upon a website from a salvage yard in Australia that had the light I was looking for, along with the part number I was looking for:
92800-K2030
I searched and found it for sale at a whole bunch of Hyundai dealer websites. In mid-August I placed an order at one, and a week later they sent me....The center interior lamp that I already had. Apparently if you put in your VIN when ordering, the dealership will take it upon themselves to check to see if your car originally came with that part. And if it didn't, they'll change your order to the one they think it should be. (Well, at least this dealership did).
Over the next few months I placed several orders for this part at multiple dealerships. Every one of them would cancel my order, saying the part wasn't available. Sometimes it was canceled within a few hours, sometimes up to a month later. I'm not sure if this was due to the general problems with obtaining parts recently, or if maybe I had stumbled upon some Australia-only part number that was difficult to get in the states. In any case, around the beginning of November I bit the bullet and ordered the part from the Australian salvage yard, paying almost as much in shipping as the part itself.
And of course as chance would have it, two weeks later one of the dealerships that I had placed an order with actually came through with the part.
Wiring:
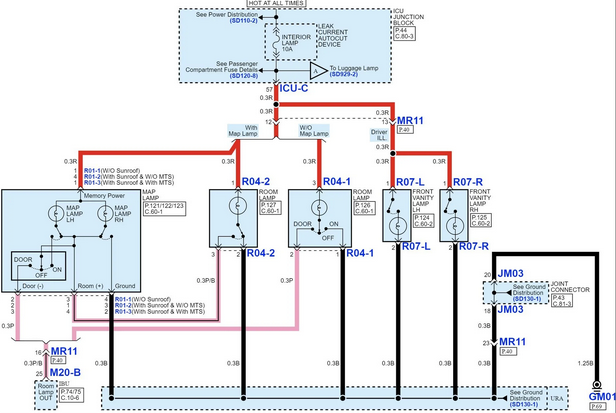
When I had taken my headliner out before, I had already run some wires from the center lamp to the front to make this future job easier. There are 3 wires to the center lamp: Power, Ground, and a switched wire that turns the light on or off with the door switch. The switched wire works in reverse of what I expected though: I thought it would switch to +12v when the door opens, becoming a temporary power wire. But testing w/ a multimeter showed that it was +12v with door closed, and opening the door made this wire become a temporary ground. This also corresponds to what the Venue electrical diagram shows:
The new light for the front has four pins on it. Three of them work the same as how I just described the center light (Power, Ground, and Door Switch).
I believe (based on the electrical diagram and my testing w/ a multimeter) the fourth wire is intended to serve as a switched ground for the center lamp. Also, in the diagram it seems like the center light is supposed to only have an on/off switch when the front light is present, not on/off/door. This configuration is shown in this YouTube video:
Installation
I decided to install my lamp independently of the center lamp, which meant that the 4th pin would be unused. Since I was running these wires myself, I didn't have the proper connector, so I snipped off some of the plastic around the connector pins and soldered wires directly to them. I added some heat shrink tubing to them so they wouldn't wiggle around and cause a short (just to be safe).
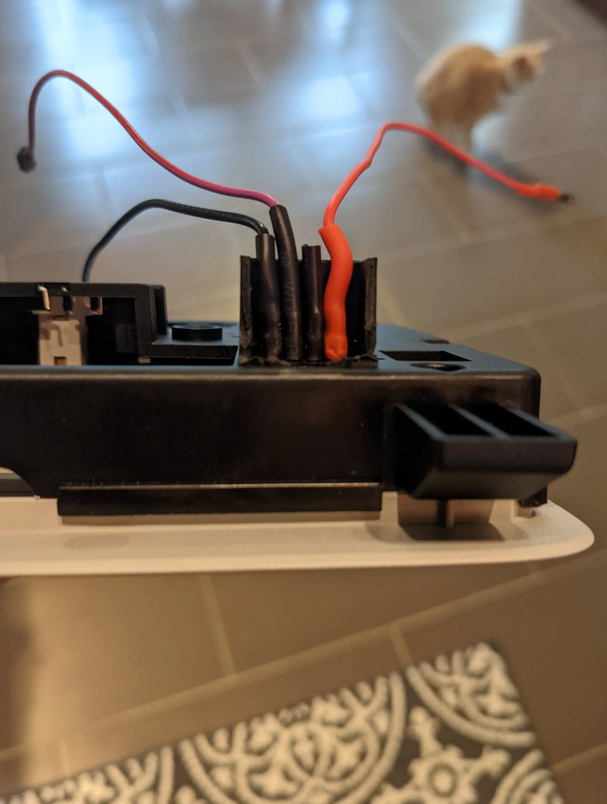
Left to right: Ground, Door Switched, Unused, +12v Power.
Cutting through the headliner was easy because there's already an outline of where the lamp is supposed to be. Just take your time, and remember that you shouldn't be cutting all the way to the edges of the outline. The outer grey shell of the map lamp rests in this imprint, but you only need to cut a hole big enough for the inner black part of the lamp to fit into.
I cut a little at a time until I was sure I had it just right. The last thing you want to do is cut too much and then have a light that rattles around because it's loose, or even worse, have to buy a whole new headliner.
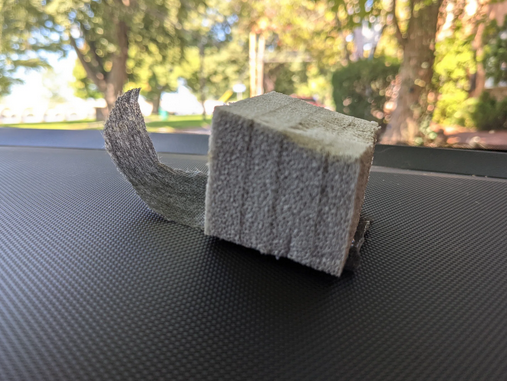
Finally: Behind the outline that I cut out, there was a block of foam that prevented the headliner from being pushed up against the roof.
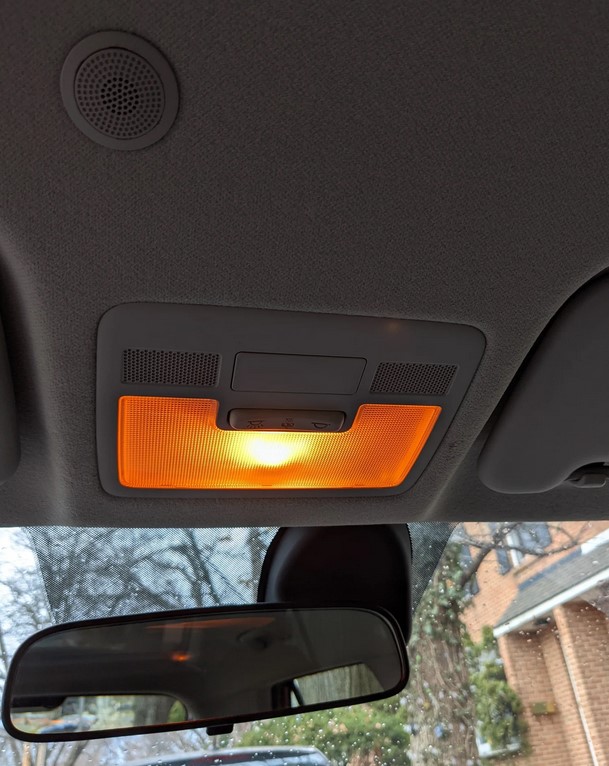
The finished product: