Just as the title states, I ordered front and rear kit from R1 Concepts.
I've used R1 Concepts a lot in the past and i've never had any issues with parts quality or longevity.
The pictures below are of the front install only, I ran out of time to get the rears done, but probably the easiest brake job on any vehicle i've owned.
Parts:
Front Slotted Rotors: 810-76080R & 810-76080L
-Front ceramic pads: 2310-1293-00
-Rear Slotted Rotors: 810-76079R & 810-76079L
-Rear ceramic pads: 2310-1632-00
*New brake hardware clips and wear indicators front and rear
They offer Eline and Geomet (premium) as well as plain, slotted, and slotted/drilled. I've always preferred slotted over cross drilled and slotted especially from an aesthetic view point.
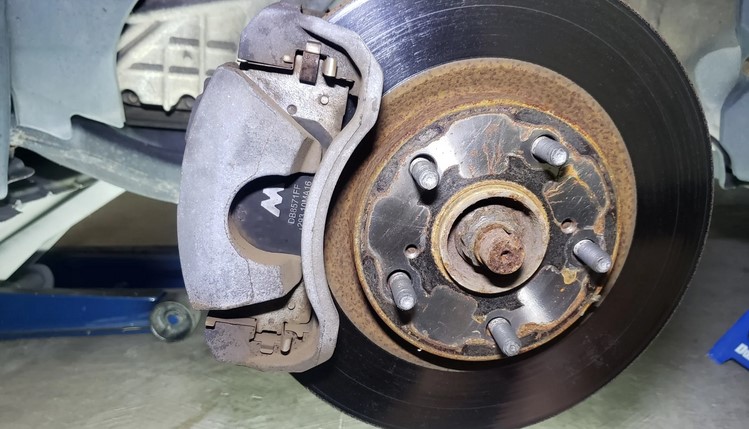
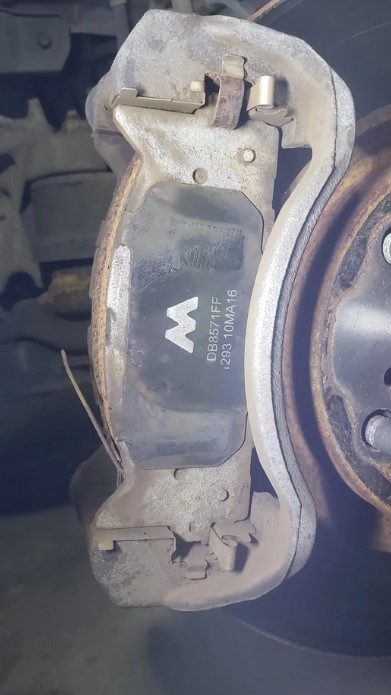
Now for removing the old brake parts, man the rust was rough... looks like the pads and rotors that were on there were Autozone/Duralast Max. Most of the time during the job was cleaning grime/crud/rust off of everything.
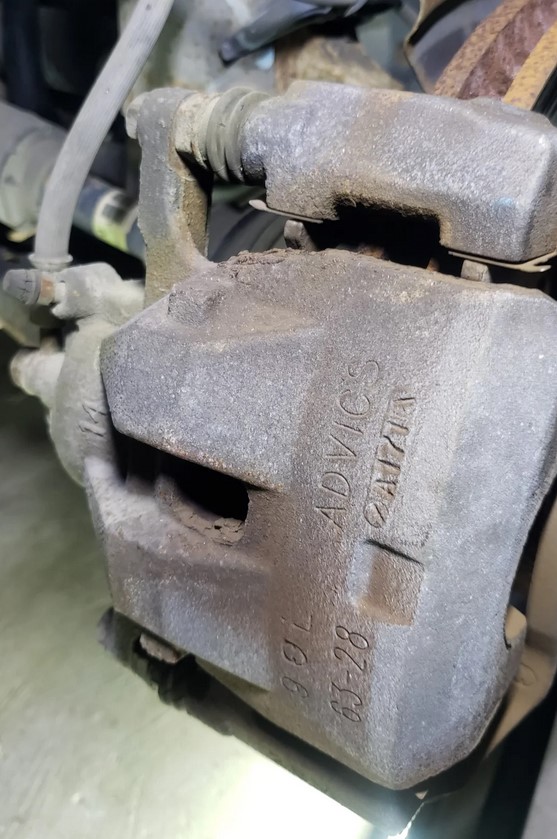
ADVICS Calipers, so i'm assuming these are the originals. The caliper bolts are 14mm and require 25ftlbs of torque when reinstalling.
Removed one of the retaining springs before i took the photo, it wasn't missing.
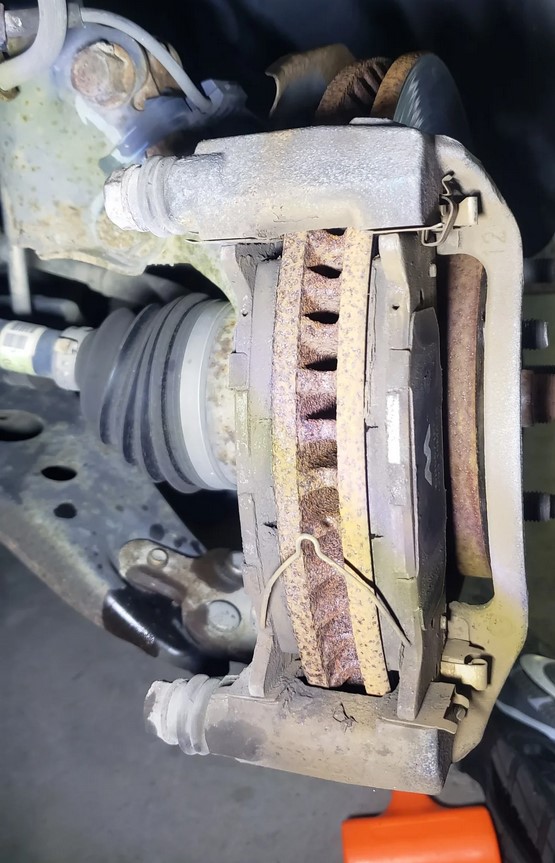
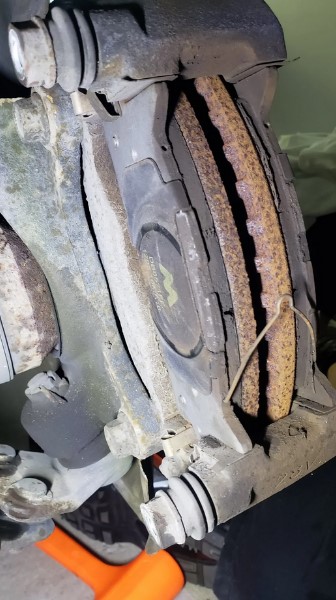
Removing the old Duralast Max pads
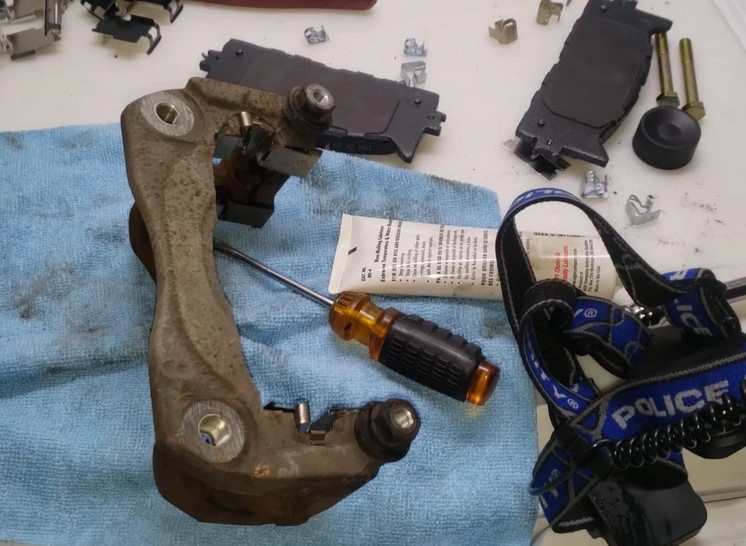
Caliper bracket removed: Have to remove two 17mm mounting bolts preferably with a socket. When reinstalling you will need to torque to 79ftlbs. Also, in regards to the caliper slide/guide pins, the BOTTOM will have the rubber O ring. I also applied SilGlyde Brake lubricant to the slide pins.
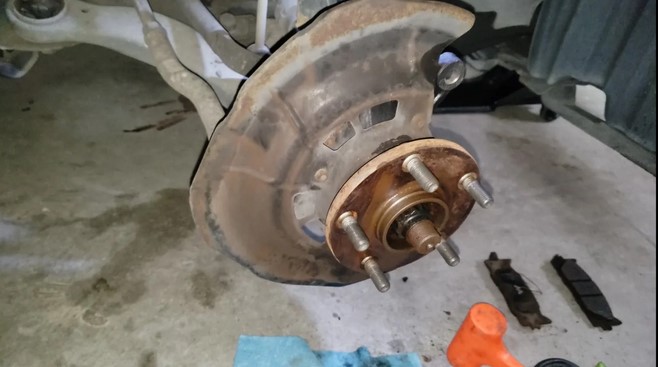
The rotors were rust frozen onto the hubs. So you'll need to invest in a pair of M8x1.25 bolts (30-40mm length) to brake the rotor away from the hubs. Also, take the time to clean the hub surface and studs with a wire brush. I didn't bother adding any anti-seize to the hub surface, because those are getting replaced after seeing they shouldn't be to hard to remove/reinstall.
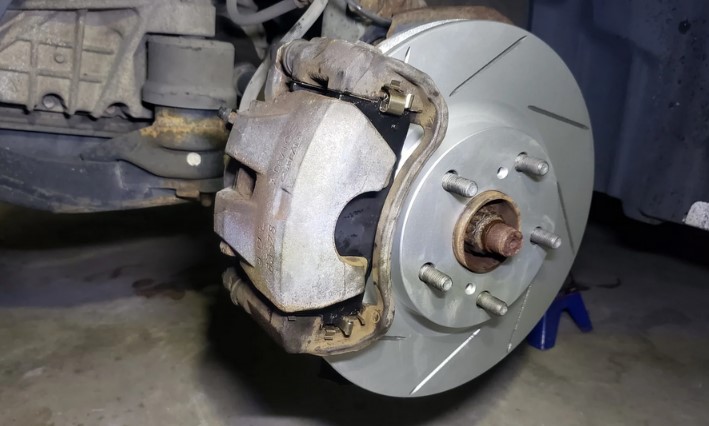
Now with the new parts, just reverse the steps and use the info on the link provided at the top.
I didn't take many pics of the installation process, but just remember to use brake lubricant on the pad ears, slide pins, a light coat on the slide clips as well. Also, the 17mm bracket bolts are torqued to 79ftlbs, and the 14mm caliper bolts are torqued to 25ftlbs. You may need to use a thin jawed adjustable wrench, or wrench to fit around the slide pin nut to keep it from spinning the slide pin potentially damaging the dust boots when torquing them down.
Lastly, during the initial drive, I followed the PowerStop Brake Bedding procedure, I've always used this method and never had an issue. Plus, PowerStop is part of Centric, which R1 Concepts uses Centric rotor blanks and then machines and GEOMET 360 coats the rotors in house.
Brake Bed Procedure from Powerstop
"5 moderate to aggressive stops from 40 mph down to 10 mph in rapid succession without letting the brakes cool and do not come to a complete stop. If you’re forced to stop, either shift into neutral or give room in front so you can allow the vehicle to roll slightly while waiting for the light. The rotors will be very hot and holding down the brake pedal will allow the pad to create an imprint on the rotor. This is where the judder can originate from.
Then do 5 moderate stops from 35 mph to 5 mph in rapid succession without letting the brakes cool. You should expect to smell some resin as the brakes get hot.
After this is complete, drive around for as long as possible without excessively heating the brakes and without coming to a complete stop (Try for about 5 minutes at moderate speed). This is the cooling stage. It allows the heated resin in the brake pads to cool and cure"
Hope this thread helps to those doing a brake job and/or are interested in using R1 Concepts rotors over your typical parts house brands.
I'll post more pictures once I finish the rear rotors/pads and post them on this thread.