Hello Everyone!! I hope everyone is doing fine during this COVID-19 Pandemic.
I'm a proud owner of a 2005 Equinox 1LT, and as such, I'm trying to make it last as long, make it better and improve it overtime.
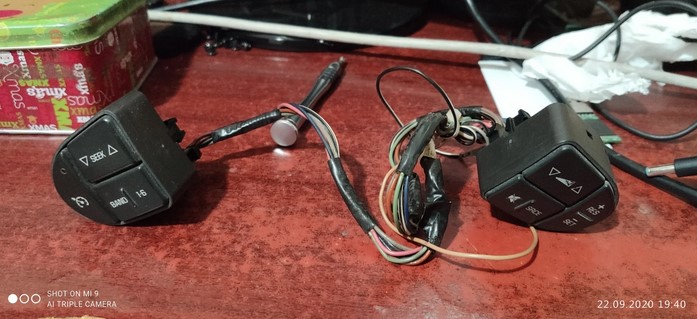
So, this will be a guide to add Audio Controls with Cruise Control on the 2005-2006 Equinox with the older style 4-spoke GM Steering Wheel shared with the Malibu and other cars (Adding RPO UK3). Fortunately, GM have installed the wiring already for both the Audio and Cruise Control in the harness and the Clock Spring, so it is more Plug and Play than expected. (This can be used on the LS or LT, ONLY IF IT HAD CRUISE CONTROL OR THE HOLES FOR THE BUTTONS; If it doesn't have the holes, it will require the whole steering wheel assembly.) If you don't have the factory Delphi Radio, this is not for you (Unless you want to swap the unused audio controls for only the Cruise Control Buttons) Also, I brought both the buttons and the harness used, to save money and to have it fast. GM (via ACDelco) sell both buttons new on Amazon (or in my country, MercadoLibre), this is very useful if the button itself had failed. However, the only thing I don't see ready to be selled is the harness, so that had to come from a Junkyard or similar.
So, without further ado, Lets Get Started:
Parts and Tools Needed:
Adding UK3 or Audio Controls
GM P/N: 16869661 (Internal Wiring Harness for both buttons w/UK3)
GM P/N 22719860 (Right Hand Buttons)
GM P/N 22719859 (Left Hand Buttons)
Removing UK3 or Putting a Steering Wheel with holes for only using Cruise Control:
GM P/N 1669660 (Internal Wiring Harness for both buttons w/o UK3)
GM P/N 22719858 (Left Hand Button)
GM P/N 22732841 (Right Hand Buttons)
It is very necessary to swap the wiring harness if you are adding or removing the RPO UK3 because 2 (Pin C & D) wires are used for Audio Control, also the connectors on both sides are wider (UK3) or shorter (W/O UK3)
1- First and most important, DISCONNECT BOTH BATTERY TERMINALS AND WAIT APROX. 10 MIN! (This will prevent Air Bag Deployment; In the Service Manual it says you can Disarm it removing the AIRBAG 10A fuse under the Glove Box Compartment, but I recommend more redundancy.)
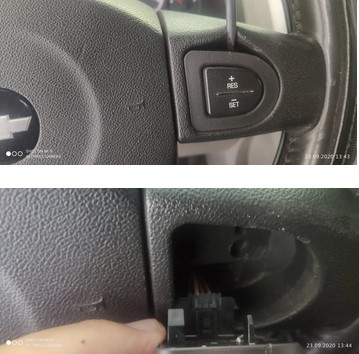
2- Remove Both Buttons by using a flat screwdriver, then disconnect it from the harness
2- Remove Column Covers:
-Pull up the upper part
-Unscrew the 3 bolts under the lower part
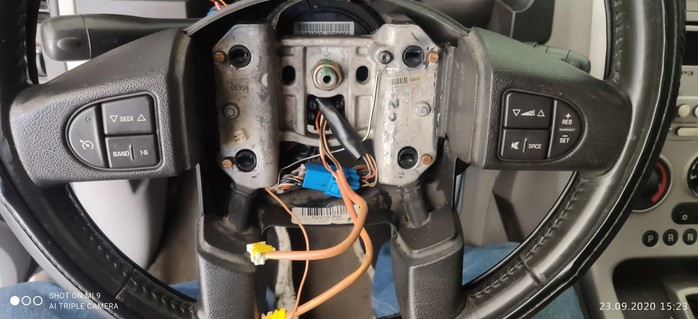
3- With the Car correctly put in Park and the Parking Brake on, put the Key in the Ignition and in the Accessory or the ON Position, Move the Steering Wheel back and forth until you can reach the screws or the Airbag remove openings. If (like me) you don't have Airbag removing tools, remove the 2 T-20 screws from the the large black plastic from the back of the steering wheel itself, so it can slide back, so you can see the Airbag metal spring retainers (In red) and press the edge with a flat screwdriver while you pull out the Airbag assembly. Do this on the 4 retainers until you can remove it from the steering wheel.
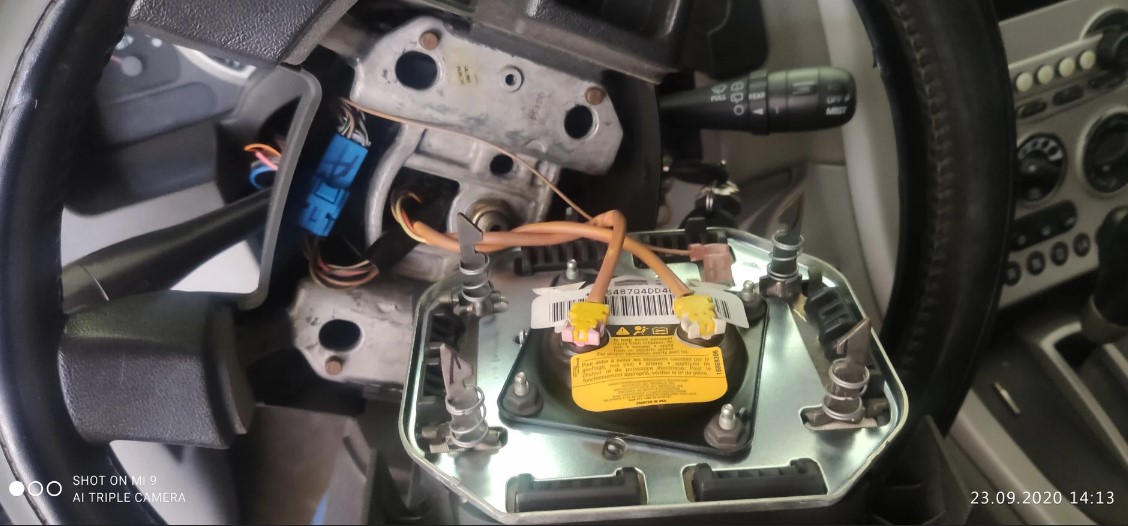
4- Disconnect both Airbag connectors and the horn ground connector, and leave the airbag out of the car, in a dry and safe environment. (Consider it like a loaded weapon).
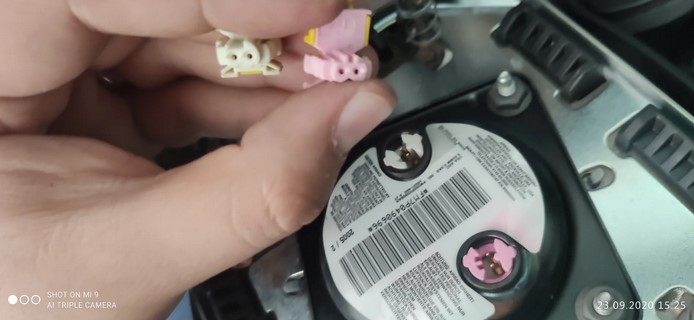
5- Remove Common Ground Screw (T-20) from the frame, Slide the Blue Connector from the retainer and disconnect the Middle Harness, then pull out the connectors for the buttons out as a whole.
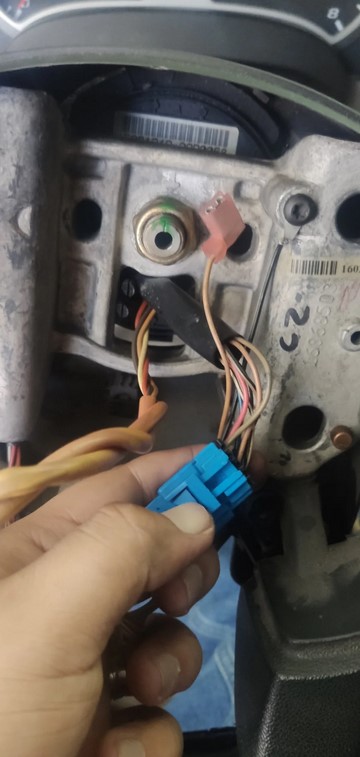
6- Connect the new connector in place, reinsert the wiring to the lateral spokes until they reach the hole of the connector, then connect the new buttons and screw back the ground connector in the steering wheel frame.
7- Put back the T-20 screws to the plastic from the back of the Steering Wheel, this will prevent the Airbag Retainers from moving or sliding away while reassembling. Then, Reconnect the Airbag and the Horn Ground to the Airbag Assembly, push it all the way to its place and reassemble everything. (I cannot put more than 10 images, so i cannot document this part of the process), then reconnect the Battery, sit on the passenger seat (in case anything happens) and turn ignition on. Test all buttons to see it they work.
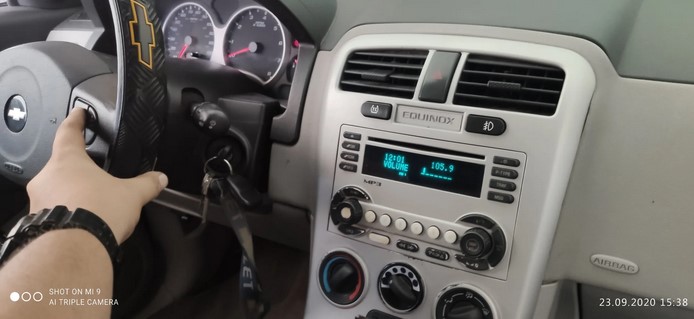
Well, Everything works, the Mute, Volume, Source, Seek, Cruise Control and the Lights! Less distraction and a better usefulness overall.
Because of the limitation of only 10 images, I only post the most relevant steps to do in order to install (or remove) the RPO UK3 for the Audio Controls and/or Cruise Control Buttons. I will post this guide in a more complete fashion and more related stuff on my Blogger Page about this and other repair/tricks/mods that I've done to my Equinox so far.
Thanks for stopping by!! Greetings!!!
Story’s Author
 Mexico, Guadalajara