How To Replace Headlight Bulbs On 2014 Honda Pilot
Last Updated on 2026-07-15
Now picture this: I take you over to the garage, sleeves rolled up, with a piping mug of coffee placed on the workbench. You 2014 Honda Pilot is right in front us, but it has a single headlight out. You are wondering whether it is ideal to take it to the elecrtical shop, to which I chuckle lightly- because in my head, you can make it work. It should take you a couple minutes to replace the headlight bulbs, this isn't astronaut engineering after all. Just make sure to have some patience and your favorite tunes of the day, and you should be good to go.
In case you haven't tried this before , I can give you a run down of the process while pretending we are working on it together. For starters, I’ll tell you how to remove and change the headlight bulb step by step and further, I'll arm you with other tips for maintaining your vehicle’s wheels and wipers, guaranteeing that your Pilot remains safe and pristine on the road.
Step 1: Getting Set Up — Tools, Safety, and the Right Bulb
Put on some gloves to protect your hands, ensure better grip, and also to keep your fingers off the new glass bulb. Since dirty oils from your fingers can cause the bulb to burn out prematurely, using gloves becomes essential.
With everything else considered, the next step is to grab a new bulb. For the 2014 Honda Pilot, the low beam requires an H11 while the high beam needs a 9005. If you're not certain, it's best to check the manual or the previous bulb. Also remember to grab some latex or nitrile work gloves, a flashlight, and a screwdriver if something needs prying.
Most importantly remember, safety comes first. Ensure the car is off and the key is out of the ignition before popping the hood. Additionally wait a while for the engine to cool down, as working near moving parts or hot metal is extremely dangerous.
Step 2: Replacing the Headlight Bulb – One Step at a Time
Here’s where we roll up our sleeves and get to work. Follow this in order:
1. Pop the hood and prop it open securely.
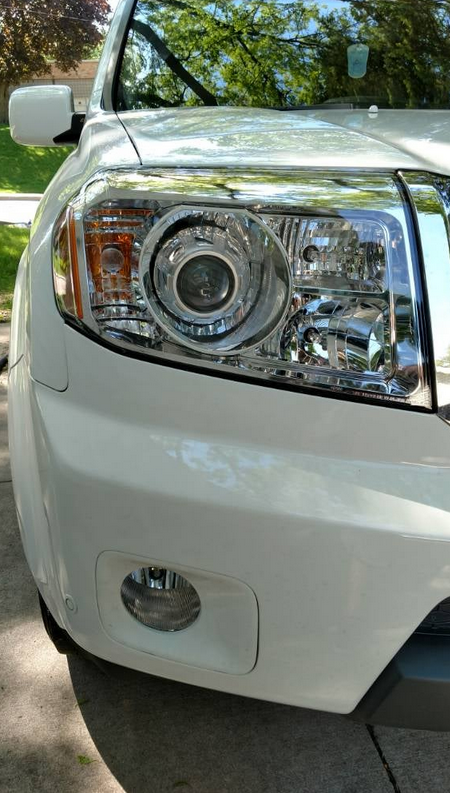
2. Locate the back of the headlight assembly. You’ll find the bulb tucked behind the housing, closer to the fender.
3. Unplug the power connector. There’s a little tab — press it and pull the connector straight out.
4. Twist off the dust cover if your model has one. Go counterclockwise and set it aside.
5. Grab the base of the old bulb and turn it counterclockwise to unlock it. It’ll feel a little snug, but it should give. Pull the bulb out gently.
6. Grab your new bulb. Don’t touch the glass! Slide it in, line it up with the notches, and twist it clockwise to lock it in place.
7. Put the dust cover back on and reattach the power connector. It’ll click into place when it’s seated properly.
If you needed to remove the air intake duct to get more space on the passenger side, reinstall it now. Those plastic clips are easy to snap, so be gentle.
Step 3: Light It Up and Double-Check
Be sure to hop into the driver’s seat, start the engine, and turn the headlights on. If everything was done correctly, the new bulb should work and shine bright. While you’re at it, check both low and high beams... sometimes people forget which one burnt out, or worse, both are weak.
If your light does not turn on, don’t panic. Turn everything off and double check the connector and the seating to the bulb. If all looks well, then pop open the fuse box underneath the hood and check the headlight fuses. Sometimes a fuse will blow when the old bulb goes out as well.
Keep in mind, if one bulb has burnt out, the other is most likely not far behind. Changing both sides at once is recommended as it saves you from needing to do the same job a few weeks later.
Additional DIY: Wheel Specs and Bolt Pattern – If You’re Thinking Mods or New Rims
You ever think about upgrading your wheels? Whether you're going for a tougher stance, a smoother ride, or just a different look, it's important to know your specs before ordering anything online or heading to the shop.
Your 2014 Honda Pilot comes standard with:
-
18-inch wheels
-
Bolt pattern: 5x120 mm
-
Center bore: 64.1 mm
-
Lug nut torque: around 94 lb-ft (128 Nm)
With aftermarket rims, check the bolt pattern precisely and ensure the center bore does too; otherwise, you'll be needing some hub-centric rings. Like always, torque your lugs properly or you risk warping your rotors.
If you’ve swapped wheels, remember to check torque after around 50 miles, no need to lose a wheel while speeding.
Keeping Your Wipers Sharp – Because Seeing Is Half the Battle
Now, let’s talk wipers. You probably don’t think about them much—until it’s pouring rain and they are leaving streaks everywhere like a bad paint job. Don’t let it get to that.
On the 2014 Pilot, you’ve got a 22-inch wiper on the driver’s side, a 21-inch on the passenger’s side, and a 13-inch on the rear window. Swapping them out is quick and easy: lift the wiper arm, press the little tab, slide off the old one, and then clip the new one in until it clicks.
But here’s a little trick to keep them working longer: every couple of weeks, wipe the rubber blades down with a damp cloth. You’ll remove road grime, sap, and bits of tiny debris that cause streaking. If they are squeaking, skipping, or leaving patches, they’re done—toss them and put on fresh ones.
Final Thoughts – Why This Stuff Matters
Listen up, I know it's easy to say 'I will take it to the shop'. But for you, that is not the case. Whether you are changing a headlight bulb, swapping wheels, or giving your wipers some love, all these tasks are totally easy. More importantly, they are worth doing by yourself.
Every time you try a new do-it-yourself car project, you not only gain new skills, but you also get used to the vehicle on a more personal level. You manage issues when it's the most convenient for you. And honestly, it feels good to cleanse yourself and realize you accomplished everything.
So continue to learn more and more. And don't forget, if you ever need assistance with something, I will be in the garage with my cup of coffee and my trusty socket wrench.